As you know, AI is everywhere—whether you’re a developer, a businessman, or a photographer.
Today, I’m excited to share one of the top AI-powered photo editing applications on the market: Luminar Mobile.
Recently, I reviewed Luminar NEO, the desktop AI-based photo editor, which went viral thanks to its impressive features like AI Sky Replacement, built-in AI presets, and many others.
Future of Photography | Top 10 Best AI Photo Editors For Artist
Now, I’m reviewing Luminar’s latest release—their brand new AI-based photo editor for smartphones, simply called Luminar Mobile.
Throughout this article, I’ll be using my iPhone 11 to showcase some of its most important and favorite features provided by this cutting-edge smartphone editor.
Luminar Mobile: Innovative Photo Editing For Your Smartphones
I personally love the features of these Luminar photo editing applications. They offer a seamless experience with AI-powered tools that make editing more efficient and creative.
- UI/UX: The Experience
- Basic Editing Tools
- Structure AI
- Relight AI
- Skin & Body AI
- Other Important Tools
- Sky Replacement (AI-Based)
- In-build presets (LUTs)
now let me demonstrate each feature with some extra details and examples…
UI/UX: The Experience
I absolutely love how Luminar designs its applications, whether for mobile or desktop. The user experience is smooth and intuitive.
After downloading the app and logging in, it immediately prompted me to select photos.
I choose a RAW image I had captured using my Sony A6000 mirrorless camera, and in no time, the image loaded on the main page.
The interface of the main editing page looks clean, organized, and user-friendly, allowing for quick and efficient edits.
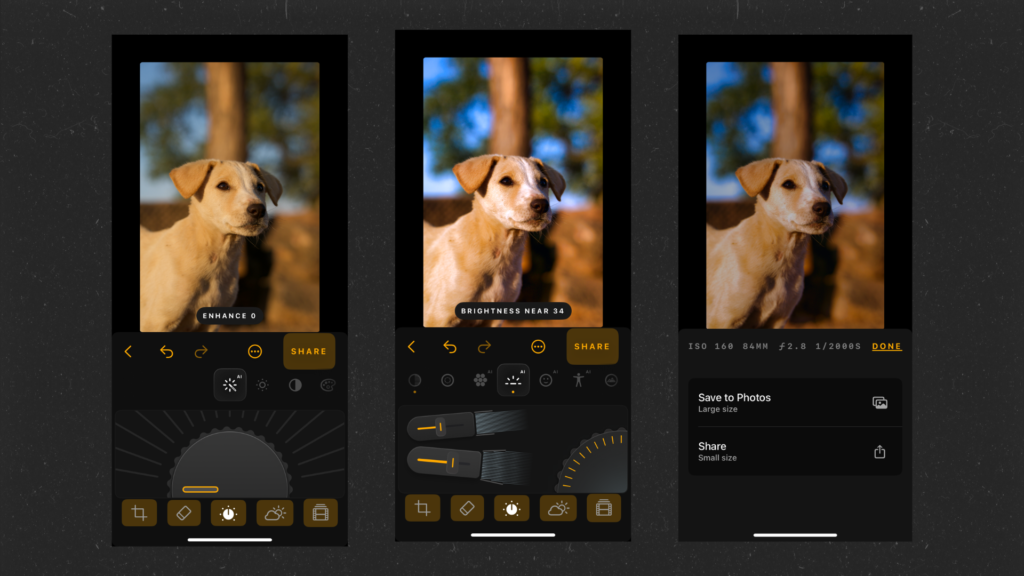
I love the color combination of the application and it’s pretty easy to access each menu because all of them are one click away.
now let’s talk about the feature this Luminar App provides…
Basic Editing Tools
Once you select a photo to edit, there are five different tabs available in the Luminar app. The first tab that activates is the home tab, which offers basic editing tools.
While these tools are simple, Luminar’s unique presentation makes them stand out.
The design and functionality are impressive, making each tool easy and enjoyable to use.
One of the standout features in this tab is the Enhance AI tool.
Using AI, this tool automatically analyzes the subject along with the foreground and background to enhance the image.
It features a dial that allows you to adjust the intensity of the enhancement, giving you precise control over the result.
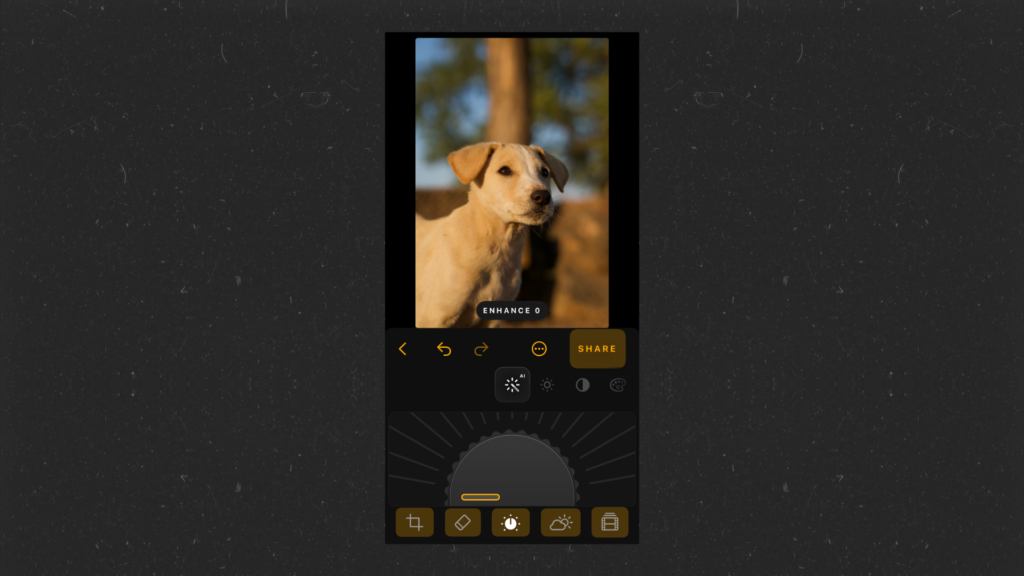
The fun part of using the Enhance AI tool is the tactile experience—when you spin the dial, you can actually feel the haptic feedback.
Luminar added this subtle touch to enhance the user experience, and it works across all the options, whether you’re adjusting exposure, shadows, or any other settings.
Following the Enhance AI tool, there’s another option called Develop, which includes a comprehensive set of adjustments.
In this section, you’ll find controls for Exposure, Highlights, Whites, Blacks, and Shadows, giving you the flexibility to fine-tune your image in detail.
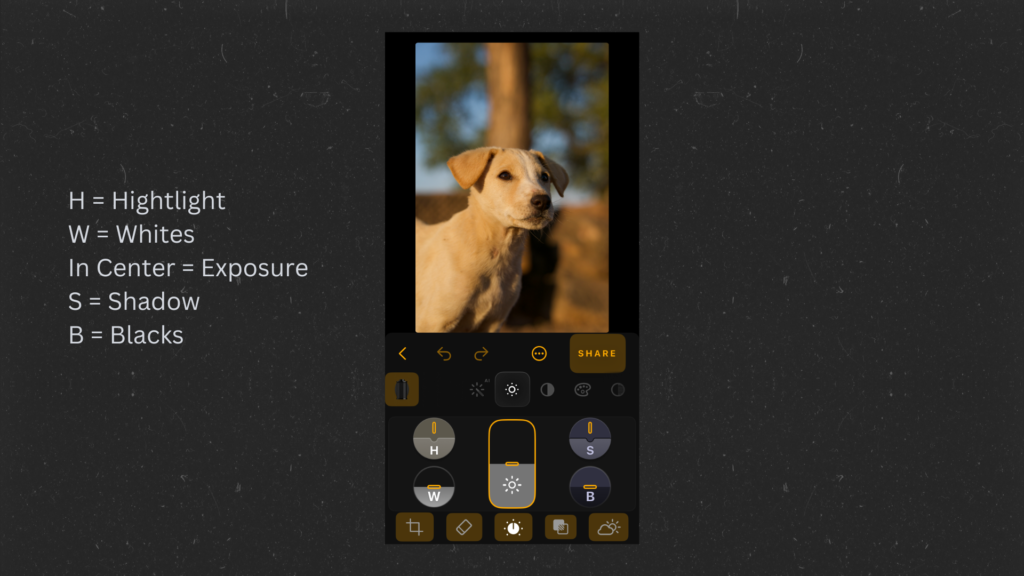
Each of these features contains its own unique dial, which is easy to use and feels pleasant to use.
Then we have some other editing options available with their unique UI like contrast, color, saturation & Vibrance, and Vignette.
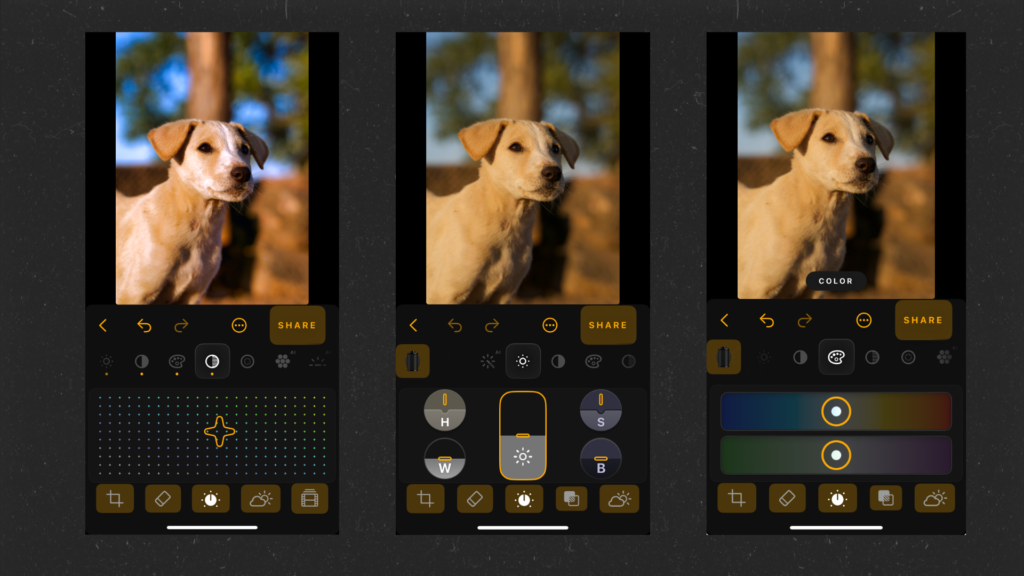
Each of these tools comes with a different + interesting look as mentioned above in the image…
now let’s talk about some AI-based photo editing tools provided by Luminar…
Structure AI
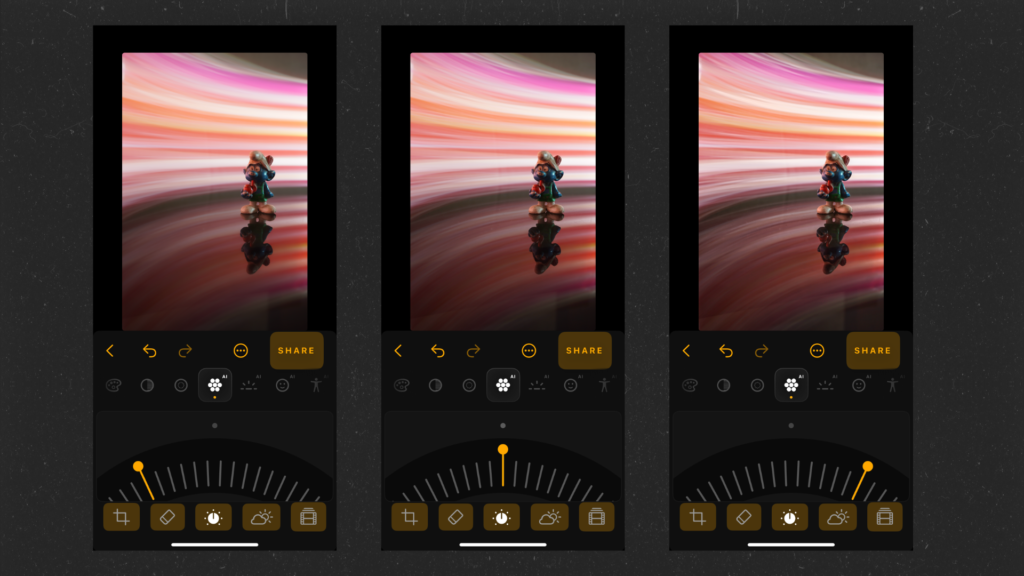
The Structure AI tool is perfect for adding extra clarity to your images using AI. It’s very straightforward—just select Structure AI and adjust the dial as needed.
The dial allows adjustments between -50 to +50 points, giving you control over the image’s clarity and detail.
Below, you can see an example comparing a normal photo and one where I applied the Structure AI feature, highlighting how much difference it makes in enhancing texture and details.
Relight AI
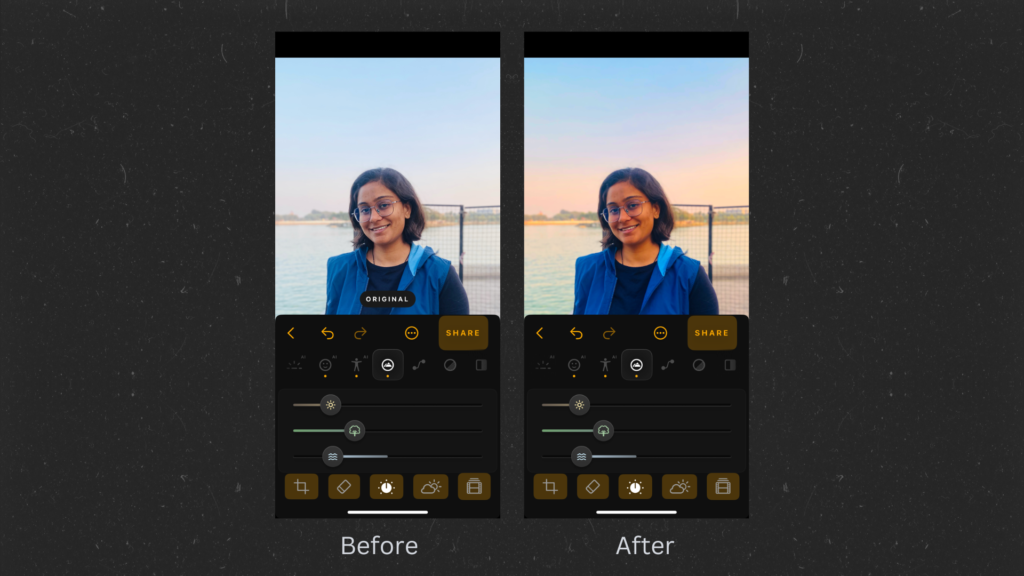
Relight AI is one of my favorite tools provided by Luminar. Imagine you have an object centered in the frame with some negative space in the background, and you want to brighten only the background.
In other tools like Lightroom, you’d need to create a linear mask and manually adjust the exposure.
But with Luminar Relight AI, it’s incredibly simple. You can use the Brightness Far and Brightness Near options to adjust the lighting in specific areas, allowing you to brighten the background or foreground effortlessly and in no time.
This saves a lot of effort while giving you precise control over your image’s lighting.
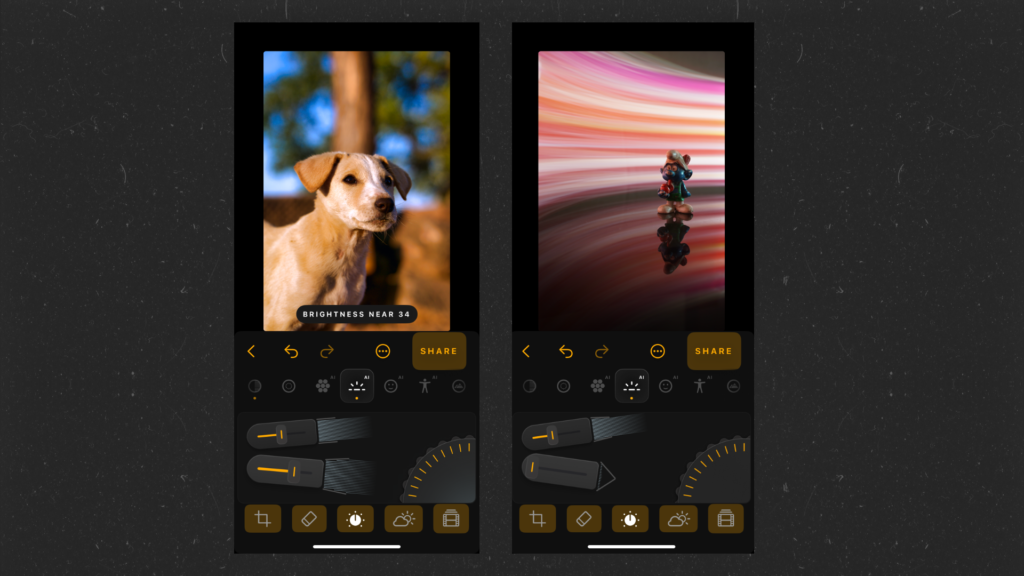
we can even change the depth based on the requirement.
Skin & Body AI
The Skin AI tool in Luminar is fantastic for enhancing the model’s skin. It offers features like Blemish Removal and Shine Removal, both powered by AI.
These tools work seamlessly together, allowing you to effectively address skin imperfections.
You can also adjust the intensity of each effect according to your requirements, ensuring a natural and polished look without over-editing.
This makes it incredibly easy to achieve professional-quality skin retouching in just a few clicks.
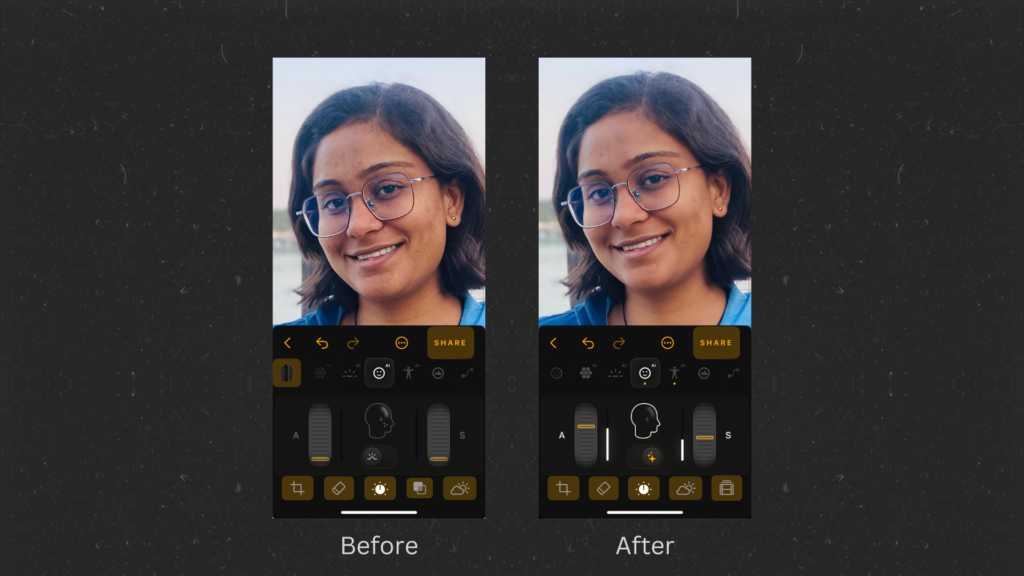
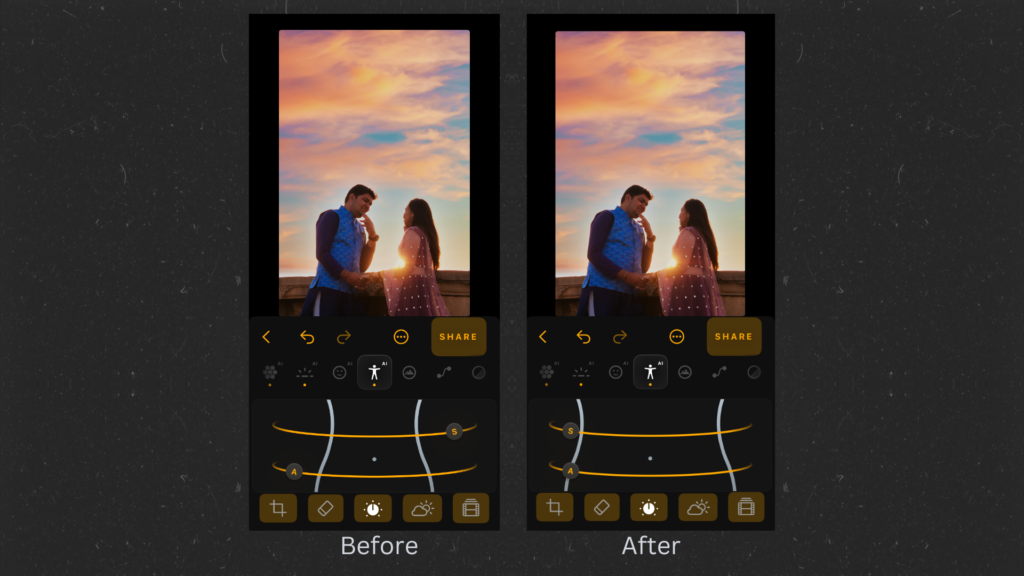
On the other hand, Luminar also features a new option called Body AI.
This tool allows you to adjust the size and shape of the subject’s body with remarkable ease.
What’s fascinating is that you can make a fuller figure appear slimmer in just seconds using this editing tool.
I’ve tested this feature on various subjects, and it works incredibly well across the board.
It not only saves a significant amount of time but also delivers impressive results, making body adjustments quick and efficient without compromising quality.
Other Important Tools
Luminar offers a variety of other essential tools, including Landscape, Curves, Details, Monochrome, and Object Removal.
I particularly enjoy the Landscape tool, as it provides several options like Golden Hour, Foliage Enhancer, and Dehaze.
By playing with these settings, you can transform an ordinary-looking photo into a stunning, professional-quality image.
These features enhance the colors, clarity, and overall mood of landscape photos, making them truly stand out.
I also like the object removal tool available within the Luminar application as a separate menu on the tab section.
It’s pretty straightforward to use (And Pretty quick).
Sky replacement (AI-Based)
This is the feature I’ve always wanted to use on a smartphone device, and Luminar finally delivers it: Sky Replacement.
While there are many other sky replacement apps available, I’ve often found issues with their usability and picture quality.
It seems that many of these applications added sky replacement just for the sake of having the feature.
In contrast, Luminar has taken this capability to a whole new level. It’s incredibly user-friendly.
Depending on your requirements, Luminar can adjust the color contrast and position of the sky directly within the mobile app.
You can even reposition the sky, modify the rays of light, and add your custom skies. This level of flexibility is simply awesome!
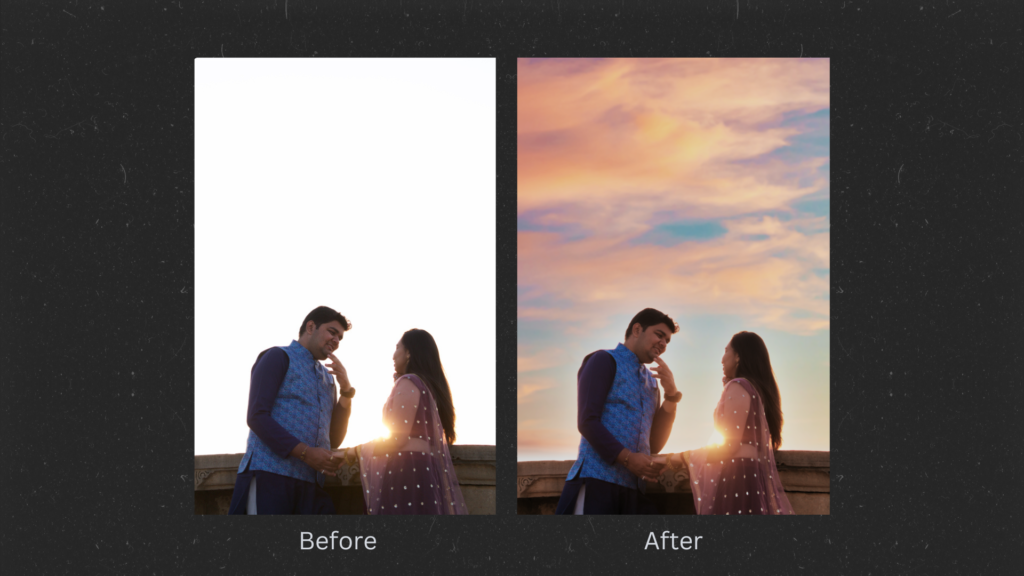
I hope you got the idea after seeing the above examples.
In-build presets (LUTs)
If you’re new to photography and editing stuff then this feature is for you.
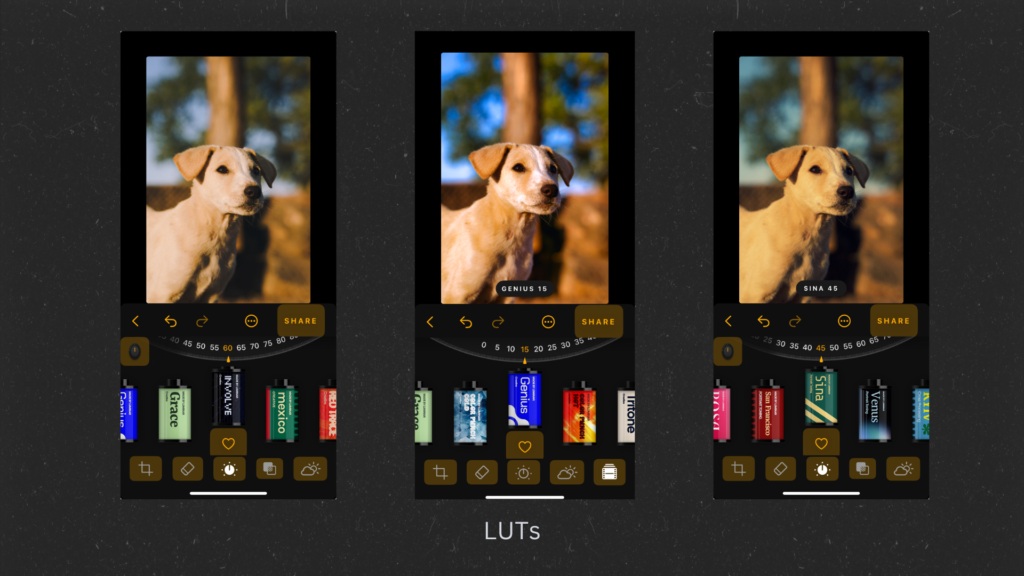
This feature provides some in-build / popular presets, which we can apply or any image.
Luminar provides a bunch of different options (also for landscapes) and I personally liked Genius Made by Luminar.
Things to improve
There are a couple of areas where I believe Luminar could improve for a better user experience, especially for artists editing photos with this application.
Firstly, I find the absence of a dedicated Luminar Gallery to be a drawback.
The workflow is quite straightforward: you select an image and start editing. However, if a user accidentally presses the back button or closes the app, any unsaved edits are lost, forcing them to start over unless they’ve created their own preset beforehand.
Additionally, for users without a photography background, some of the UI elements may take time to understand.
While the app functions exceptionally well, it can be challenging to locate certain options initially.
That said, the unique editing vibe that Luminar offers makes it worth the effort. Once you get accustomed to it, the experience can be quite rewarding!
FAQ(s) about the Luminar Photo Editing App
Some commonly asked questions about Luminar Editing App…
Who Can Use Luminar Photo Editing Application?
So as of now (Oct 2024), Luminar Mobile is available for iPhone devices + Ipad + Vision Pro.
To use this application all you need is IOS 17 or newer.
What Does Luminar Mobile Cost?
Luminar Mobile is now available as a subscription, with pricing starting at $4.99 (€3,99) for 1 month, $19.99 (€15.99) for 6 months, or $29.99 (€23.99) + a 7-day free trial for a yearly subscription.
For more information and to download the app, please visit the App Store.
Or you can review the Luminar Subscription plan here.
Final Words
Luminar Mobile has become my go-to photo editing application on my iPhone. It’s user-friendly and packed with essential photo editing tools powered by AI.
In this article, I’ve highlighted some impressive design editing tools along with images to showcase their capabilities.
The app is lightweight, quick, and features a delightful haptic effect throughout the interface.
I encourage you to take advantage of their 7-day free trial to explore this innovative approach to photo editing on your smartphone.
Overall, I’m thoroughly enjoying this AI-based photo editing application, despite a few minor improvements that Luminar could make, which I’ve detailed in this article.
Feel free to read the full article and share it with any friends who find editing photos with Lightroom, Snapseed, or other mobile apps tedious.
Have a great day!


 FREE Guide Revealed!
 Don't Miss Out The Opportunity To Earn as Photographer in this year :)