HSL panel/slider is one of the best editing features (most frequently) I eternally used.
Using this Panel I can easily pop out some dead colors or even remove some not matching colors.
there are many other benefits of the HSL panel exists which you’ll know later in this article…
as a photographer, everyone wants to capture something outstanding.
no matter if you’re shooting indoor or outdoor, using natural or artificial light.
once you get the shot, it’s time to make some final changes by using some post-processing application/software like Lightroom ( it’s not necessary but every photographer loves to do that, at least me 😀 ).
If you don’t know anything about Lightroom then don’t worry.
in this article, I’m sharing a little intro about lightroom and then will share some important tips to use HSL sliders using lightroom.
now let me share a small definition Of the HSL slider & why it’s very important…
What is HSL Panel/Slider and how it actually works?
The HSL sliders are hue, saturation, and, luminance.
which are three magical values that are the basis of color that might be used to give some mind-boggling color effects in your photograph.
The colors in an image are one of the most attractive features.
although, black-and-white photographs have their fan base. Colors bring images to life with great attraction.
Post-processing of photographs is an essential element that ultimately adds to the beauty of the art.
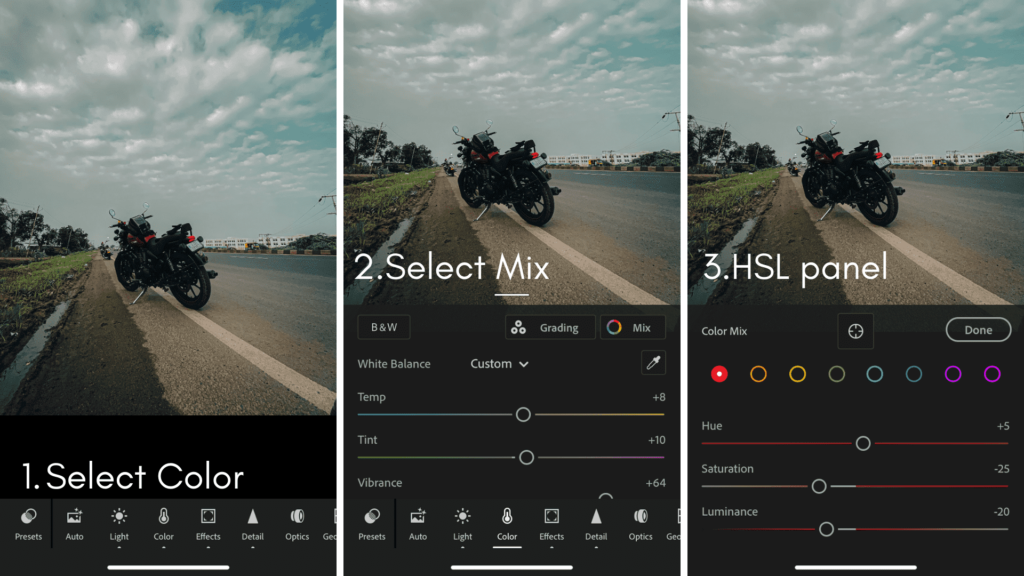
Find HSL Slider on lightroom mobile
- Open lightroom
- Select Color
- Select Mix
- and use the HSL panel…
Using HSL panels might seem intimidating but, that does not mean you cannot excel at this.
HSL adjustments will enable you to brighten or emphasize specific saturation.
it also attracts the viewer’s attention to any desired spot and, controls the hue of a few colors.
You can also use mesmerizing black and white colors and edit them.
Even black and white editing can give you fantastic results.
The essential aspect is understanding and managing colors which can help you get the best possible outcomes.
The HSL panel will let you adjust each value individually.
so you have a ton of control over the colors in your photo, and you can create and fix any color very precisely.
now you know something about the HSL panel and how it actually works.
But before you do editing stuff, you need to choose the right editing application or software which supports such crazy functionality.
so in this article, I’m sharing a few tips to use the HSL panel using Lightroom mobile.
As a photographer, I’m pretty sure you’re aware of lightroom and its functionality.
but still, if you don’t know what is lightroom and why I love to use the HSL panel using lightroom then please check out this small introduction about lightroom…
What is Lightroom?

Lightroom is an editing program from adobe.
It lets you edit and adjust a whole range of settings.
whereas, you can also arrange in a systematic order and tag your work.
that’s a very short and simple description of the lightroom (know more about lightroom), now let’s get back to the HSL sliders…
The HSL sliders are features of adobe lightroom.
which allows you to change the saturation, hue, and luminance by Using A slider which is called the HSL slider.
The HSL sliders can help you get the most out of your image,
If you want to learn & understand more about HSL then you need to understand the chemistry between each color.
and how each color combination works under the hood.
Role Of Color In Photography
It is clear that color is essential but an easy element to maintain, control and adjust.
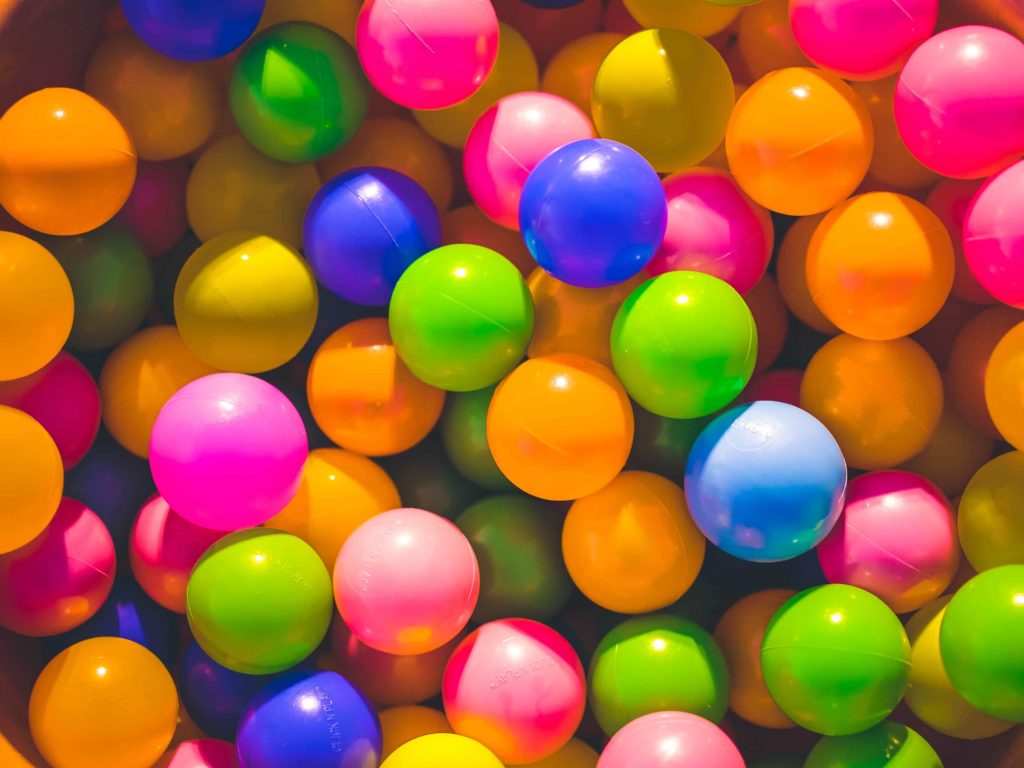
Photo by Greyson Joralemon on Unsplash
sometimes as a photographer, if you want to express your feelings then black and white is the best way to go.
but sometimes if you want to make your picture alive and beautiful then color is the very important part.
so every time when you edit your photos, no matter if it’s portrait or even landscape remember color matters.
sometimes wrong color placement can easily ruin your perfect shot.
so make sure you choose the right color combination to get the best out of your image.
you can use some websites/tools to find better color combination ( I love colorhunt).
Points To Remember
here are some quick points which you need to remember during capturing your images to get the best result while editing your photos…
Shoot In Raw
Capture in raw format that will help you to experiment and further edit it.
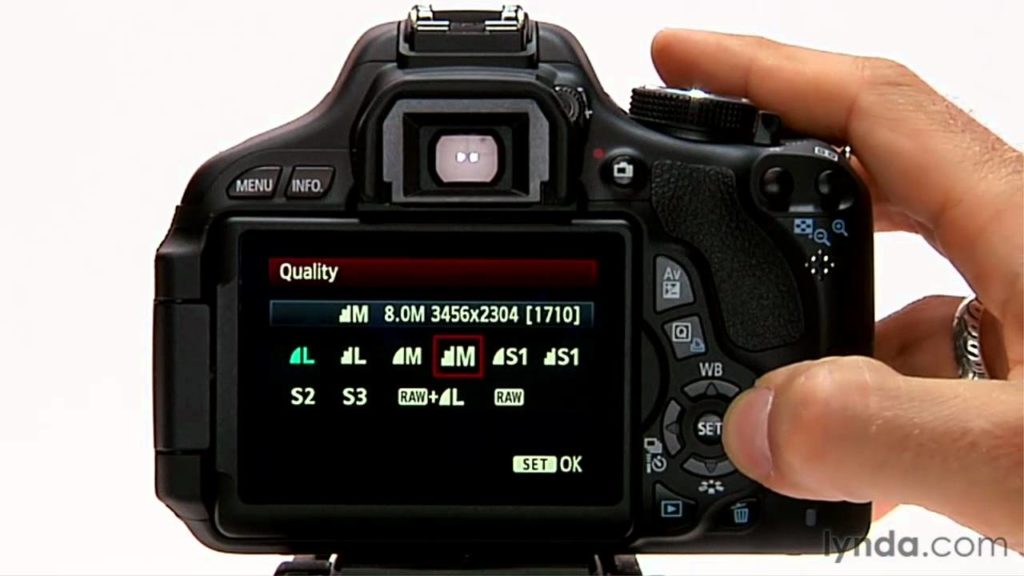
because RAW format helps you to store more details.
so during editing, you can easily get all missing details back in your image.
Use The Right Amount Of Lightning.
Every source you use should have a correct setting and, it should fit perfectly.
which will help you capture the most realistic images.
no matter if you’re planning to choose custom lights or natural light.
just make sure you get properly exposed & sharp shot.
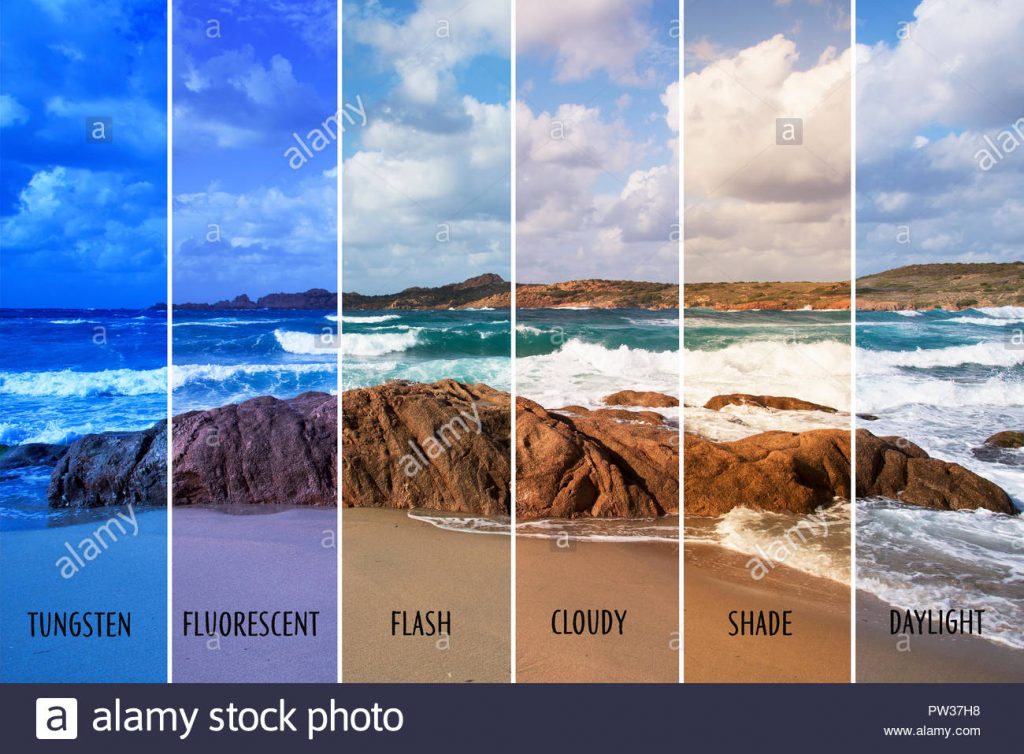
Don’t Forget The White Balance
White balance needs to be correct in every image as the color in each scene should be well represented depending on your photograph.
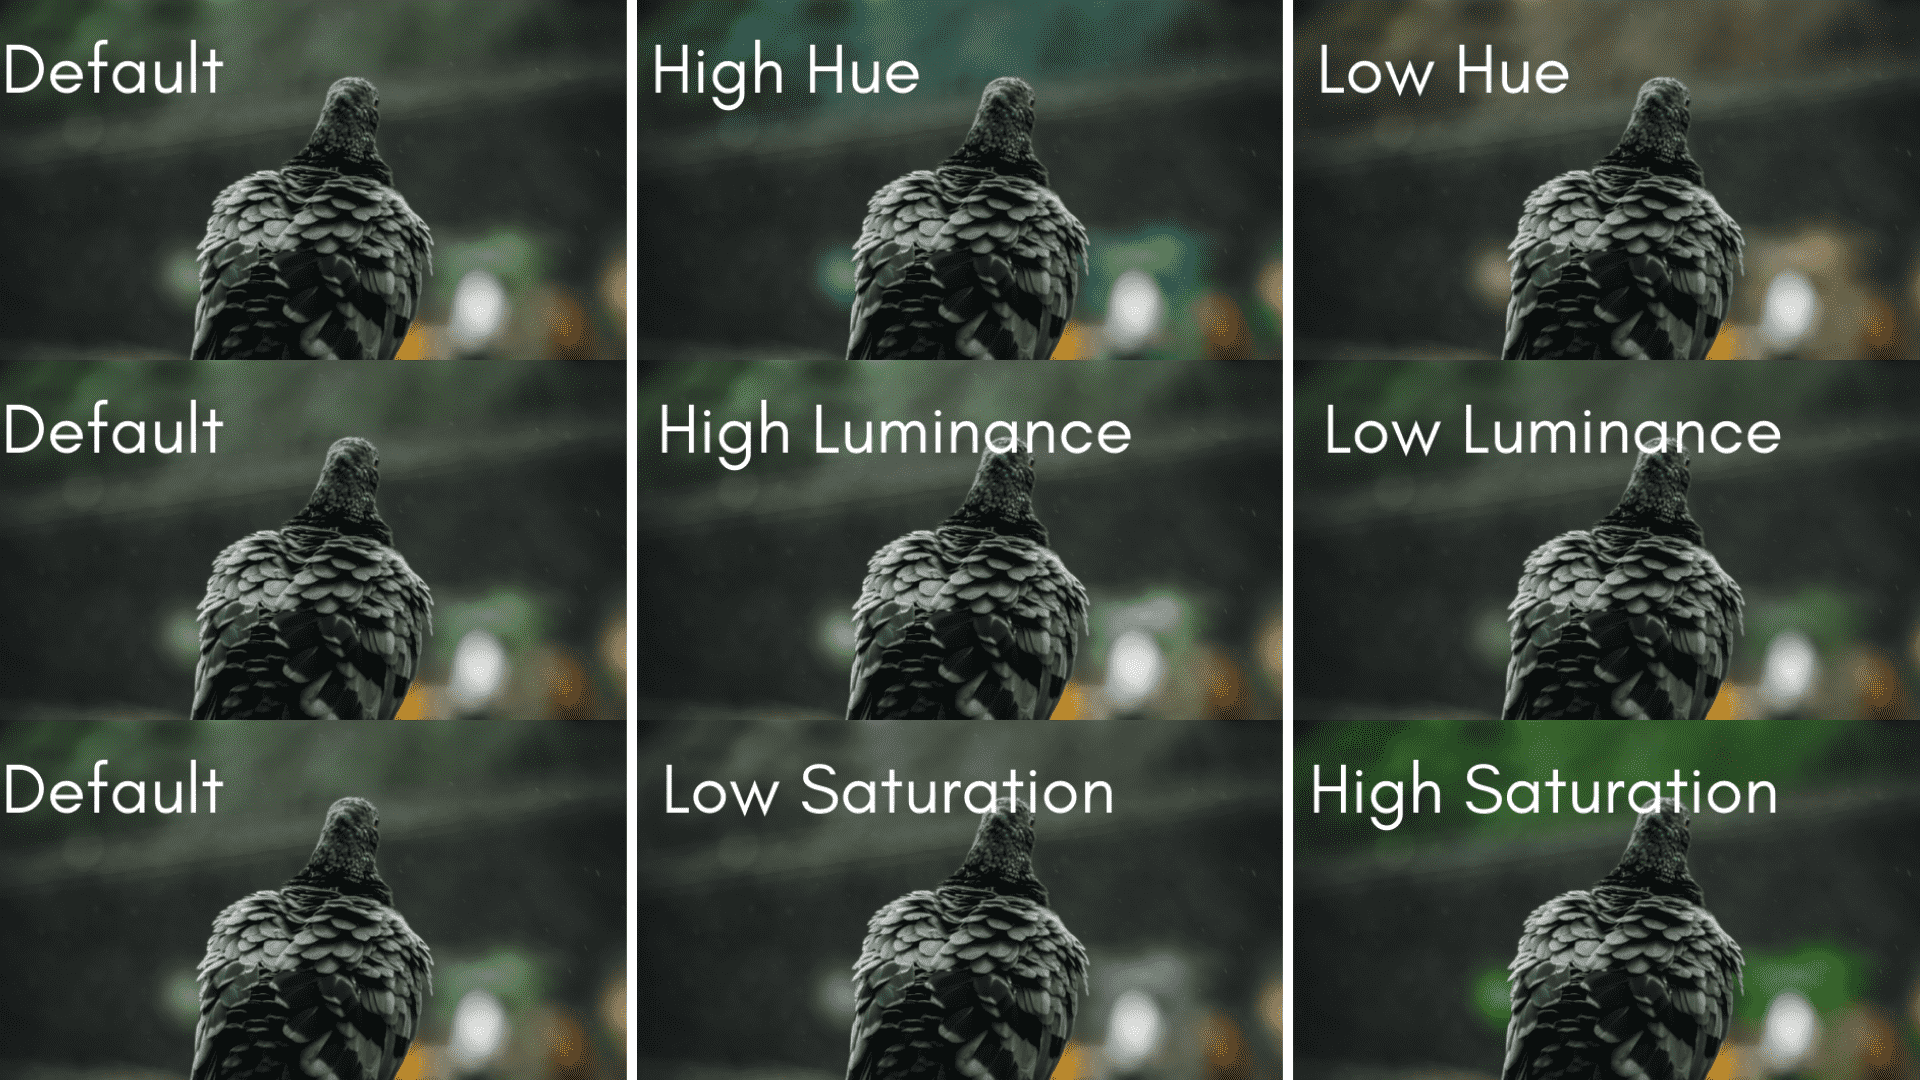
now let’s go through each and every single element which exists in the HSL panel one by one…
at the end of each element, you can also find answers to your questions like where to find the HSL panel on Lightroom.
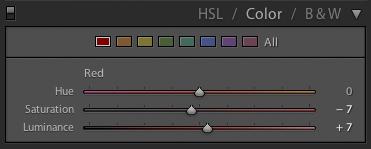
Hue
It is an amazing tool that lets you replace colors in your photography neighboring hues from the color wheel.
It changes the particular tone of a tone.
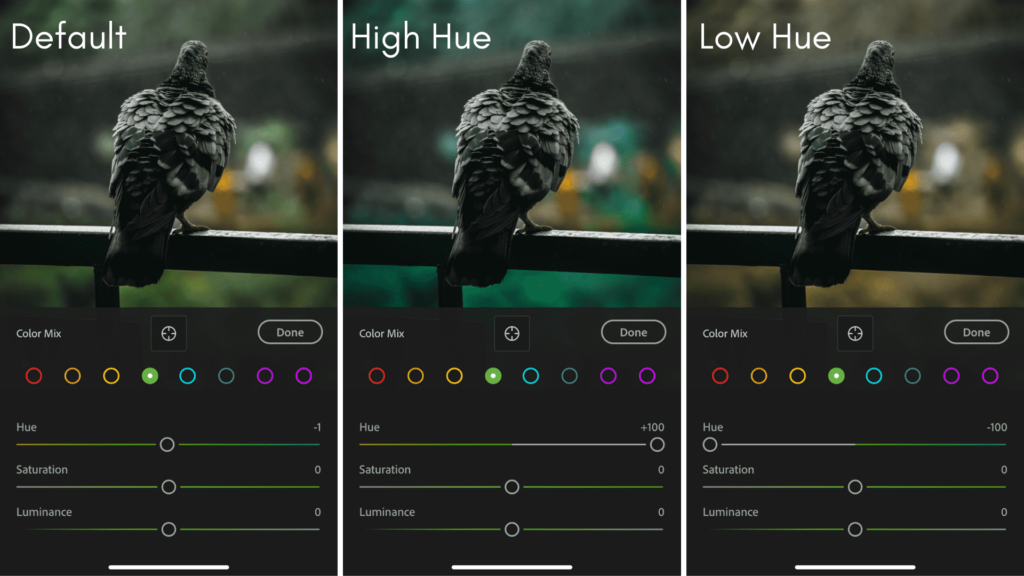
For instance, the yellow color can be changed to orange.
Hue is the shade of color on a gradient and is dependent on the wavelength of the light reflected.
Where To Find Hue On Lightroom?
You can find the HSL adjustment panel on the right-hand side in the develop module.
Within this, you can find Hue, saturation, and luminance.
The first tab is of hue sliders and, you can change color by changing the hue slider from 0-100 which will make the primary color shift to a secondary color.
Saturation
Saturation refers, to the intensity of color by sliding the saturation slider to the left can make the image desaturated, leaving a grey tone.
This panel gives you much more control than the present ones in the panel.
High saturation color will look bright and, extremely colorful.

whereas, a low saturation will provide color with a more grey look.
It is quite a sensitive slider and, doing an excess can make your photo seem over-processed.
The slider will help you to increase or decrease the saturation of the image and, it also allows you to adjust each color’s saturation individually.
Location Of Saturation On Lightroom
The saturation adjustment panel sits in the second tab in the HSL dropdown.
You can use the slider from 0-100 to increase or decrease the intensity of colors.
Luminance
Luminance is the simply reflective brightness of colors.
It shifts the exposure to a particular color with a higher luminance value.
It is one of the most frequently used of the three as it adjusts for the light and darkness of a specific color due to its range of colors listed.
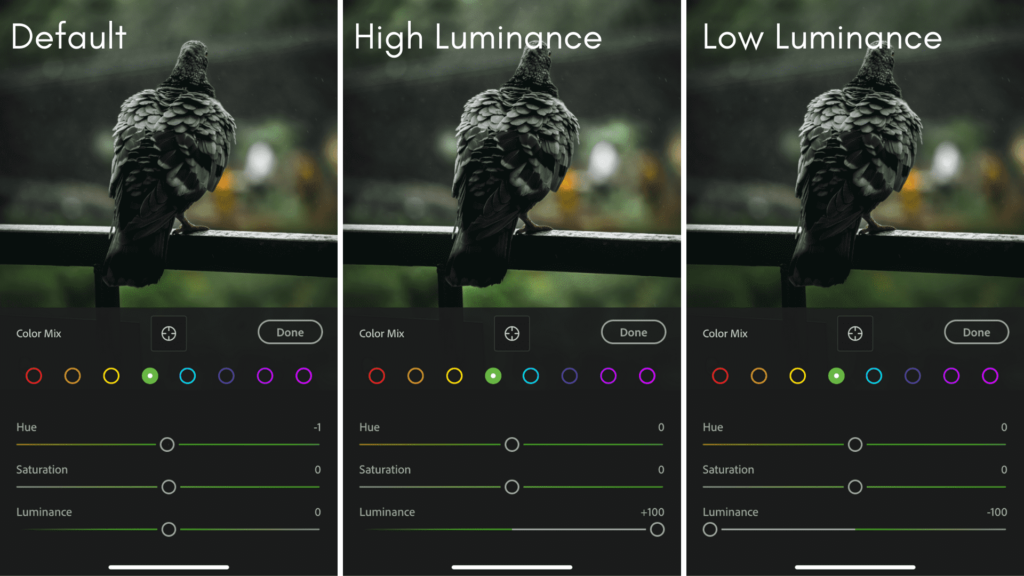
It is mainly useful when there are few colors within the image that you feel should be either darker in tone or brighter.
That works well in black and white photographs, a higher luminance value, your color will get brighter, whereas lower luminance will make it darker.
Luminance Adjustment Panel On Lightroom
The luminance adjustment panel sits in the third place which is next to the saturation adjustment panel in the HSL dropdown.
By raising the luminance slider from 0-100 makes the color in the image lighter.
Using All Three Sliders
The idea is that you can use all three sliders individually or together.
one of them changes the color, one changes the strength and, one changes the brightness; therefore, they can be easily be layered.
Targeted Adjustment Tool
If you’re looking for a simple tool that can yield drastic results, then a targeted adjust tool in adobe camera raw is the best thing.
The targeted adjustment tool gives you an alternative way to do the same thing as hue.
It can be found in both the curve and color mixer panel in both the locations the tooltip indicates [T].
The only difference they have is that it is more precise than the sliders because most of the hues within your photos fall somewhere between the color sliders in the HSL tab.
The targeting tool lets you target those colors only.
Few Points To Remember
So while using the HSL panel on Lightroom, here are some points which you might need to remember to get some remarkable outputs…
Quality Degradation
If you push the sliders excessively to one side it can seriously deteriorate your image quality.
and you might even notice subtle breakdowns in your colors.
These subtle breakdowns can indicate you need to change something in HSL to improve the quality.
The level of deterioration of your image will somehow depend on the quality of your camera and your image file.
If you see indications, then make sure to switch down some settings till it gets better.
Skin tones
Skin tones can sometimes be a little hard to edit and, they can turn out badly if you are not careful.
Remember to use the saturation in a limited manner while working Luminance can be a helpful tool for the skin.
Adjust The Point Tool
The adjustment point tool is found in the top left corner of the HSL panel.
or if you’re using lightroom mobile then just go to the color section and select the option called Mix on RIght corner and select center point tool.
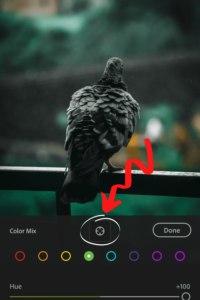
This tool can help you to figure out the color confusion in the image.
For example, if you are not able to tell which colors are exactly mixed in the area you want to edit.
POINT TOOL IMG
When you use this tool, It automatically determines which colors are established in the area.
This tool also adjusts all the corresponding sliders as you drag up or down on your image.
Select the area of your image you need to edit and then click and drag on your photo and, it will be the end of your editing. Thanks! To this tool.
HSL Panel – Conclusion
If you want to play with some colors and want to create something unique then the HSL panel is a very good option to go.
Don’t use the slider excessively and, make sure your image should look natural.
It’s not easy to get the perfect color combination every time, so do not forget to experiment, as it is the key to success.
Don’t over-exaggerate any area in the photograph which can ruin your piece of art.
If you’re asking me then if I want to focus on some required color or even want to make some moody type of feel in an image then the HSL panel is good to go.
you can even use the selection tool on lightroom and choose the HSL panel to change the colors of any specific part of an image.
May you like
- Vanishing Points in Photography | Composition Tips To Get Bangers
- Lightroom Alternative To Edit Raw Photos For Free
- Important photo editing tips for every photographer | photo editing guide
you can easily convert orange to green or anything you want.
So when you’re planning to apply the HSL panel to your photos?