If you are here then I’m guessing you know something about photography ( or only about long-exposure photography ) and I’m pretty sure that you own an Instagram account, right?
If not then please create one Instagram Account, to explore more creative stuff about photography.
Hmmm, now I’m guessing that you’re on Instagram, so have you ever seen some beautiful images of light trails Or sky painted with a flashlight like this one?
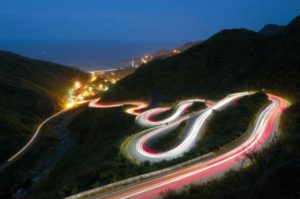
If not then these types of images are captured using the Long Exposure technique, and It’s called Long Exposure photography.
It’s the type of photography where you need to play with time and your camera shutter,
This means you need to open your camera shutter for some time like 2,5,10 or even 30 seconds to get more light into your camera sensor to capture everything within that time.
So once the time is up, you’ll get one single image that contains everything that happened at that particular time.
Once you learn more about Long Exposure, It’s quite an easy and simple way to get more creative with your photography.
You can do Steel wool photography, or write your name with a flashlight and my favourite Astrophotography.
These are just some popular ways you can apply to learn or to capture some creative shots by understanding Long Exposure Photography.
In this article, I’m sharing some simple and useful tips which you can use to do Long Exposure Photography using your Smartphone.
Yeah, as you know now every single phone contains good megapixels ( and many of them contain night mode too ) to capture better images in the worst conditions.
So it’s very easy to take long-exposure images using your phone.
That’s all we’re going to cover in this article with some cool tips and simple examples.
This helps you to learn and understand How to Do Long Exposure Photography with your Smartphone.
Now without talking more about it, let’s get started.
Do Amazing Long-Exposure Photography On Your Phone
So now you know what is the real meaning Of Long Exposure Images?
And how it actually works under the hood to capture better long-exposure shots.
Now, let’s talk about some needed Camera gear.
These gears are very helpful when you’re ready to shoot Long Exposure Photos.
Here are some of my favourite gear which you can buy online to get started with this technique.
The very first one is your smartphone 😀
I’m guessing then you’re now using a smartphone that comes with a wide-angle lens or contains some good megapixels.
If you’re not using this type of phone then please go on Amazon and gift yourself a new Smartphone.
Otherwise, you’ll not get the results, that we’re going to talk about in this article.
A Mini Tripod
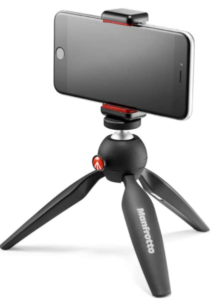
This is the best in quality among mini tripods when you need to shoot some steady long-exposure images.
This tripod comes with a Universal smartphone clamp so you can directly use it, instead of buying a clamp that suits your smartphone.
More than that you can use this mini tripod to vlog 😀
![]()
But if you’re an intermediate photographer and also own a DSLR or SLR camera then you can buy a proper tripod and a clamp just to attach your smartphone to that tripod.
Here are some Best And Cheap Tripods For Photographers Under 40$.
Now I hope you own a Good Tripod just for stabilization.
So these two are required and very important gear when you need to get started with long-exposure photography.
If you’re running low on a budget then you can use any DIY life hack to make your smartphone steady enough to capture the shot.
Use Default Camera Timer Setting before you shoot so you can remove the shakiness in your images.
Let’s Talk About The Camera Settings
The very first thing about Long Exposure Photography is that you can’t predict the camera settings.
It’s a trial-and-error kind of thing.
You need to change your camera setting according to scenarios and get the work done.
But sometimes in my case, sometimes I capture Long Exposure Images that contain some weird camera settings but in the end, the image looks pretty good.
Once you start capturing this type of photography, you’ll find out what I actually mean.
Before I show you some default settings, Let me talk about some simple features like ISO, shutter speed, etc…
we’re going to use these features to capture beautiful long-exposure images.
ISO
Basically, ISO is one of the camera settings which you’re going to use to capture images in different lighting conditions.
It can help you to get bright images in low light and also gives your dark images in bright lights.
But it comes with some disadvantages too.
Just remember this: if your ISO is too high then the sensor gets a very good amount of lights in and when you decrease ISO then the sensor gets fewer amounts of lights.
Shutter Speed
Shutter Speed works frame per second, and It’s also one of the most important factors when you’re trying out long-exposure photography.
Basically, you can select a time to make your camera shutter open ( in seconds) like 30 sec, 10 sec, or 1/1000 sec.
So for example, if you set a shutter speed of 3 seconds, then your camera shutters remain open for the next 3 seconds.
And captures everything in one single image which happened for the next 3 seconds.
That means if you’re in front of your camera and set the shutter for 3 seconds then you’ll get that light painting or light trails effect.
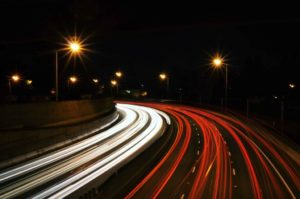
This is the simple definition of ISO and shutter speed.
You can read more about it here…
If you want to explore all these settings on your smartphone then you need to use manual mode.
You can find the manual mode on your camera.
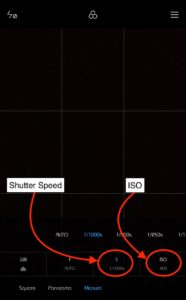
Without Manual Mode, It’s not possible to change settings like shutter speed and ISO.
If you don’t find any manual mode on your smartphone then you can buy and Paid App or even Download Free Apps To use Manual Mode.
Now it’s time to set up some default settings…
After learning more about ISO and shutter speed you can easily shoot creative images without running into any problems.
Here are some simple images which I captured using my phone.
Also, find the settings that I used to capture all these images…
Indoor Examples
Here are some indoor shots, which I managed to capture using my Smartphone.
Currently, I’m using Redmi Mi A3 ( 48 Megapixels ) to capture all of these images…
Example 1. Bulb Long Exposure Shot
This is the very first image, which I managed to capture without any tripod ( made a DIY stand using my Pocket 😀 ).
To capture this image, I used blue LED lights to get Enough Light Painting…
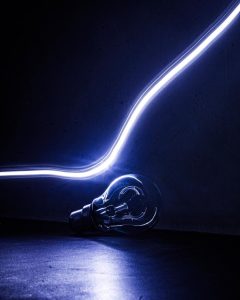
To capture this one I used ISO: 100, Shutter-speed 20 Sec.
Example 2. Using Mobile Screen As a Light Source to Get Different Colors
This is one of my favorite shots which I managed to capture using my Smartphone…
Here for Light Painting, I used another smartphone.
For unique light trail effects, I just downloaded and used some wallpapers like red + black Dot Wallpaper or any pattern wallpapers.
You can find many HD wallpapers on Google.
So just try and see what you get…
All these images are captured using my 2 in 1 addon mobile lens, checkout full review here.
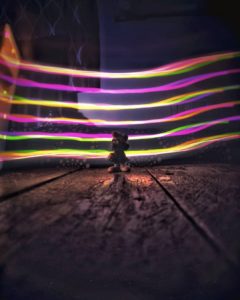
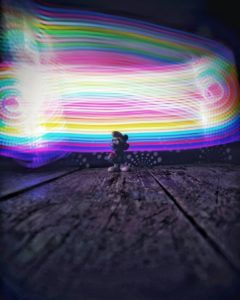
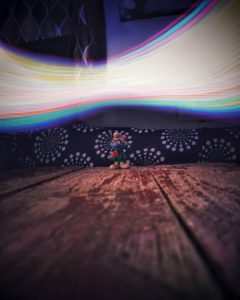
All images are captured with an ISO of 200 and Shutter-speed around 10-15 sec.
Outdoor Examples
These are some cool images that I managed to capture outdoors…
The first one is a very simple and easy one which you can also try to get started with long exposure photography…
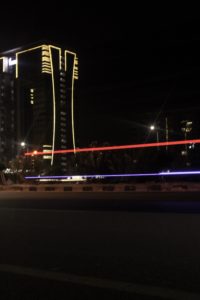
Example 1. Long Exposure to Traffic Lights
Traffic Lights are extremely common and easy to find.
All you need to do is get your tripod out and set some good camera settings and boom.
You’ll get a cool long-exposure image.
But now how to take that image to the next level, totally depends on your creativity skill.
You can use a lens ball, your Simple Lens Filter, etc… to get a Light trailer through your objects.
Or use any modal which remains steady while you shoot to get a better result.
Example 2. Long Exposure with
I did not capture this one, but I found this image so interesting and easy to capture.
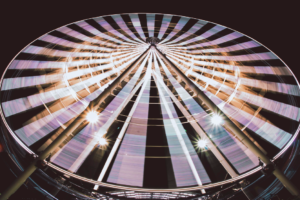
Photo by Mario Rodriguez on Unsplash
If you guys ever captured a shot like this one, then share it in the comment section.
Also, let me know which setting you used to capture this type of image.
Example 3. Waterfall
This one is also so simple yet interesting. You can try and capture this type of image to get into Long-Exposure Photography.
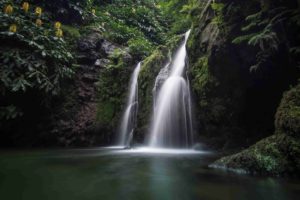
But to capture Long Exposure Images in the daytime, you need some filters.
These filters should help your camera sensors to absorb less amount of light during the daytime.
Learn How to Capture Beautiful Waterfalls In Depth
Also In this article, I shared a couple of filters to capture good Long Exposure Images during the Daytime.
That’s all You need to learn and understand to get started with Long Exposure Photography.
As I already mentioned earlier, It totally depends on you like what level of greatness you want using this photography technique.
Just remember there is no upper bound in photography, just be creative 😀
May you like
- Quick And Simple DIY Baby Photoshoot At Home | With Examples
- 71+ Nature Photography quotes for Photographers | Captions with Images
- Tips to capture sharp photos | 4 ways to get clear images using Photoshop
- 3 Easy Steps To Use DSLR Camera As A Webcam
- Important photo editing tips for every photographer | Photo editing guide
That’s all from my side, Thank you have a good day 🙂

 FREE Guide Revealed!
 Don't Miss Out The Opportunity To Earn as Photographer in this year :)