If you know how to use your camera, then you can create something amazing with it.
It doesn’t matter if you’re playing with shutter speed or aperture at the end, you’ll get something amazing as a result of your creativity.
So today, in this article, I’m also talking about something creative that I captured a week ago.
Believe me, it’s pretty awesome.
This time, I’m playing with a shutter speed and a very slow shutter speed.
Hope you know about Light painting photography.
But in case you don’t know, then this kind of photography is done with one steady object + slow shutter speed + some source of moving light.
So if you are excited and want to know how to do Light painting photography at your home for the very first time then please follow this article…
Simple Way To Do Light Painting Photography At Home
Here are some simple things you need to do to learn light painting photography at home.
The very first and foremost important thing that you need is the Object, no matter if it’s a cat, dog, or anything related to miniature (a non-living thing like a cartoon toy Hulk).
If you found your subject, then now it’s time to find a good light source.
If you’re asking me, then my personal suggestion would be a Flexible USB LED Light Lamp or mobile screen, which contains some unique wallpapers.
This Lamp helps you to get a better light source, apart from that you can even use it anywhere where you need a good amount of the source.
![]()
You can buy this product from Amazon, it’s very cheap and useful not just here but in daily life as well.
![]()
If you don’t want to spend some real money and don’t want to wait anymore to capture the same shot then you can even use your smartphone’s flashlight.
Top sites to sell your photos online & earn money
In the end, you just need one chart paper ( it can be black, red or anything which you like but not white ).
If the light source that we’re using contains only one colour, for example, white, then we won’t be able to see a perfect long exposure image at the end.
So make a good combination between light and the chart paper which you’re going to use.
Let’s do some REAL Photoshoots…
Yeah, now it’s time to shoot something amazing.
First of all, find a better place to balance your chart paper.
You need to make sure that you can capture the whole background and foreground with your subject within that chart paper.
Now, set your camera on shutter priority mode.
If you don’t know anything about shutter speed then you need to learn how to master shutter speed within the next 7 days.
You can use a tripod to steady your camera or any tool that makes your camera steady, but not your own hands 🙂
Using your hands to hold the camera can prove to be unstable and result in a blur in your images.
After that, choose a manual focus and set focus on your subject.
I captured the cover photo with my 18-55mm lens ( approx 25mm ), so basically you can use any lens between 18 to 70mm ( which performs better and gives sharp results in close range)…
Now, you are set to do some real indoor photoshoots during this quarantine.
Here are some basic camera settings which you need to follow…
- Set your camera on a tripod or at any steady position
- Use shutter-priority mode
- Set manual focus and set focus on your subject.
Final Step…
To perform light painting, the basic rule is to capture 1 image for some amount of time, and between this time, we use our light source and create some light painting.
So for example, if you set the shutter speed to 4 seconds then your camera sensors try to capture everything till the next four seconds.
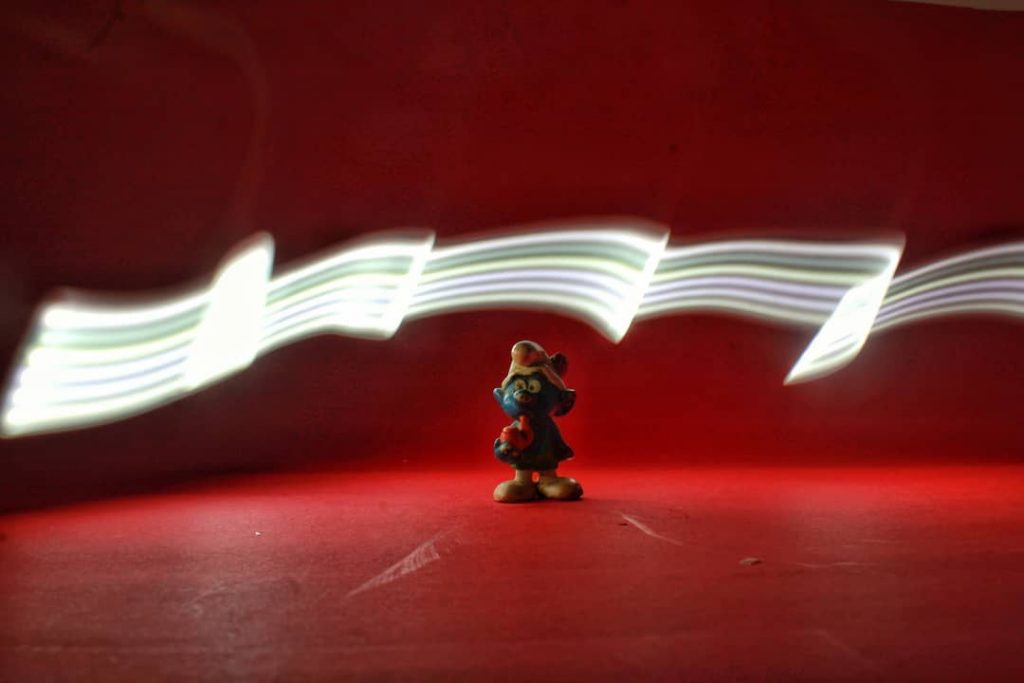
This means in between these seconds, if you move your light source in front of your camera lens, then it’ll create some light painting like this one…

This is the image I captured with a shutter speed of 1/5 seconds.
The simple rule is this, if you set the shutter speed to the max like 30 seconds then your camera sensor observes everything till the next 30 seconds.
So if you set a small amount of light source in front of your camera during this time, then you’ll get brighter output.
That means always try to perform this activity when the light source is very low.
Now you know how to do light painting or at least the basics of it.
For the first 5-7 shots, just set your shutter speed to 4-8 sounds and do some creativity with your light source.
Here is the short video which I recorded during this shoot…
You can even follow me on Instagram to find some more intresting content.
These are the images that I captured using this trick…
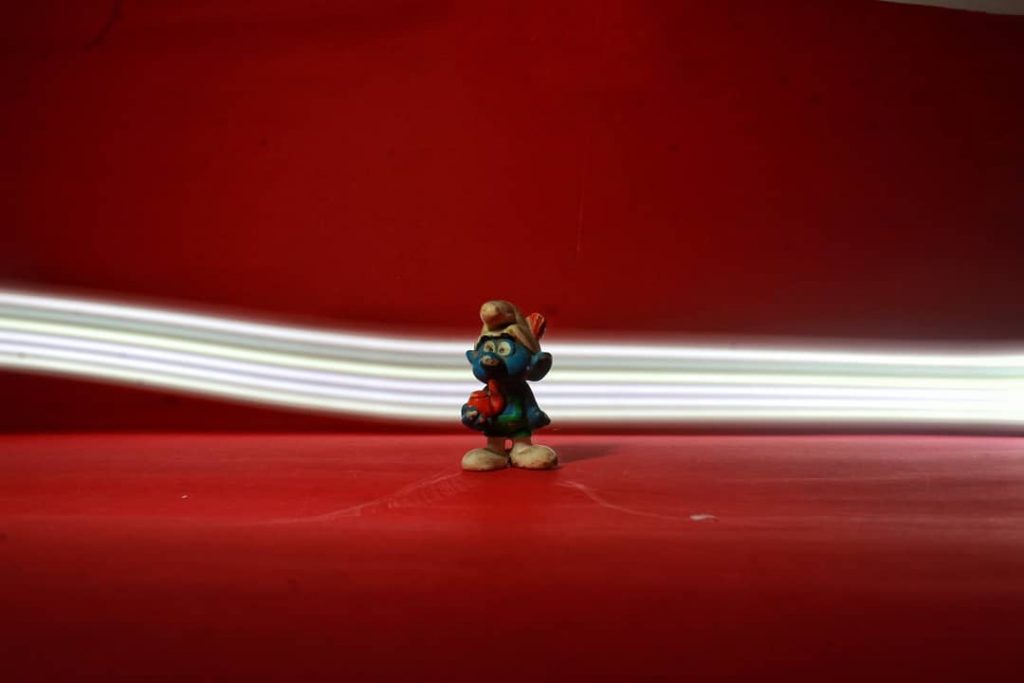

That’s it from my side, hope you guys like all this crazy stuff.
If you like it then please share it, have a good day.
Keep learning, stay home, stay safe 🙂