

Every photographer’s journey starts with one single smartphone when I was a 15-year-old boy I like to capture images with my smartphone.
and after that, I got my first DSLR ( now I own a Mirrorless camera :D).
at that time it’s too confusing to understand all the features and modes which are available in that DSLR but not on my smartphone.
That’s my story about how I started looking for a basic DSLR guide, to capture the best photos.
but you don’t need to do this because here you find the ultimate guide to using your DSLR from beginner to professional level.
there are lots of new features and modes available in both companies (Nikon and Canon)’s DSLR.
and mostly these two devices are more frequently used by any photographer out there in the market.
so in this article, I am taking the example of Canon 1300D (don’t worry 90% of specifications are the same as Nikon’s DSLR), and we learn all the modes and features that must be understood to get better results from your DSLR.
Let’s begin!!
The ultimate guide on How to use a DSLR camera
- Read manual
- Understand the camera
- Holding the position of your camera
- Our King: ISO
- Our Queen: shutter speed
- Our Princess: aperture
- A combo combination of these three – exposure triangles
- Understand all modes
- Manual focus matters
- A right tripod
- Capture off flash
- Vertical/horizontal shots
- White balance
- Image type
- Conclusion
Read manual

So that’s the basic beginner step you must have to do before capturing images with your DSLR, why!!??
because if you don’t know the basic functions of your DSLR or the working of your DSLR than how could you capture better photographs.
yeah!! I know it sounds boring, but believe me, all the time this manual takes it’s actually worth it.
I am not telling you to remember every feature, function which are available in that manual, just read the manual carefully.
because of that, you may learn a lot more new things and also be able to understand your DSLR more right way.
so the basic step is clear, now you are able to make a good connection with your new DSLR.
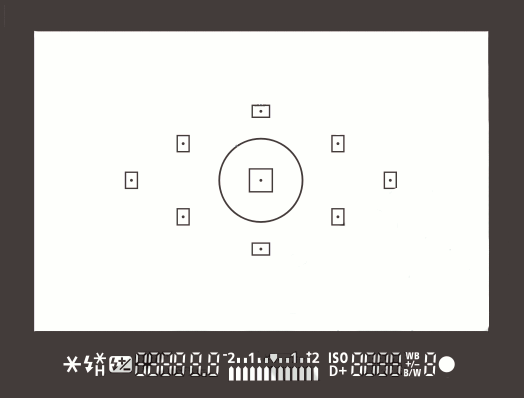
Understanding your DSLR camera
that’s the second and very important part of making a huge improvement in your photographs.
now you know how all the features and modes are working if you don’t know then don’t worry we’ll discuss them later in this article.
in this part just understand the basic features given in your DSLR camera.
features like buttons. menu or all the stuff available into that 3-inch LED screen.
Related
Holding the position of your DSLR camera
mane people ask me is the shape of your DSLR matters ??, and my answer is yes it matters.
find some best grips to hold your DSLR camera because if your grip on your DSLR is better then you don’t need a tripod anymore to capture some normal shots.
so the holding position of your DSLR matters allots just think, If your hands are not so steady then you cant able to capture more sharp images.
just make it clear with your camera that “you hold the right position by analyzing the object”.
no matter if you are doing landscape, portrait, or any other types of photography.
if you don’t have any control over the holding position of your DSLR then you’ll never get a better result, or to get a better result you must need a tripod.
Our King: ISO
What is ISO ? and Why we need ISO?
so ISO is a feature we use to manage the light that reflects your DSLR camera’s sensor while you are capturing an image.
let me make you clear, assume that you are doing indoor photography, to make your model lighter you use a flashlight.
and if the light is too high, you’ll definitely get a brighter photograph.
and if the light is too low then you’ll get darker images.
so to make the connection between your DSLR camera’s sensor and outside light we need to understand ISO.
there are two different ranges of ISO.
1. Low ISO(range:100-800)
2. High ISO(range:800-6400 or more)
that depends on the environment to use Low or High ISO, but ISO 800 is best to capture in any situation.
so you don’t need to change if you want to just click images.
What is the Low ISO Range ??
As we know the range of Low ISO is between 100-800.
if you got something really bright content or object then you must need to use LOW ISO number.
if you use ISO 100 then you’ll get a darker result then ISO 200 to ISO 6400.
so understand this only if the object is more bright or you use more flashlight then just make your ISO low.
if you get darker images then just simply increase your ISO to get brighter images.
The best time to use low ISO numbers
if you are shooting outdoor, like doing a photoshoot when the sun is high or some landscape photography, then you must need to use low ISO number in short, if your outdoor environment is bright then you must need to use low ISO numbers.
What is the High ISO Range ??
this is simply opposite of Low ISO range.
in this case, if your object is too dark then to make it brighter you must need to use high number ISO.
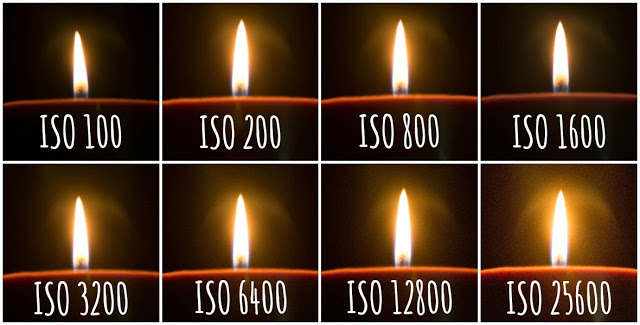
but there is one problem with high ISO range.
if you use more ISO range like 3200 or 6400 then you’ll not get sharper images.
see the difference.
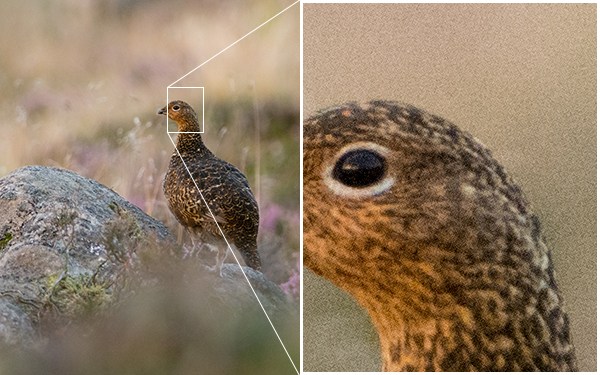
source:dps
look at the noise on the image which totally makes your image quality too much poor.
so use as possible as minimum ISO to capture sharper images.
Best time to use high ISO numbers
while doing night photography or capturing images inside one room without any flash then you must need a high ISO number.
source:picquery
Our Queen: shutter speed
here is the Queen, one of the best features you need to use with your DSLR cameras to take marvelous shots.
fist of all let’s understands the meaning of shutter speed.
so shutter-speed is the feature which you need to use to change your shutter speed either too fast or too slow, there is a range of low to high shutter speed.
the range(in a normal DSLR camera) is 30 sec to 1/4000 sec(shutter/sec), if you make your shutter-speed range at 30 sec then you capture one image in whole 30 sec.
or if you make shutter speed at 1/4000 sec then it’ll capture images too fast.
now just think if your shutter opens for a low time then what happens to your DSLR camera’s sensor ??.
yes, you are right it’ll not analyze everything so your images must be dark.
and if your Shutter-speed is too low like 30 sec then it’ll take 30 sec to capture, so your DSLR camera analyses everything so you get brighter images.
well, all these things depend on the environment, let’s understand this thing clearly with an example
When to use a low range of shutter-speed?
if you want to capture some amazing images while doing night photography then you must need to use low range of shutter-speed.
see this image…
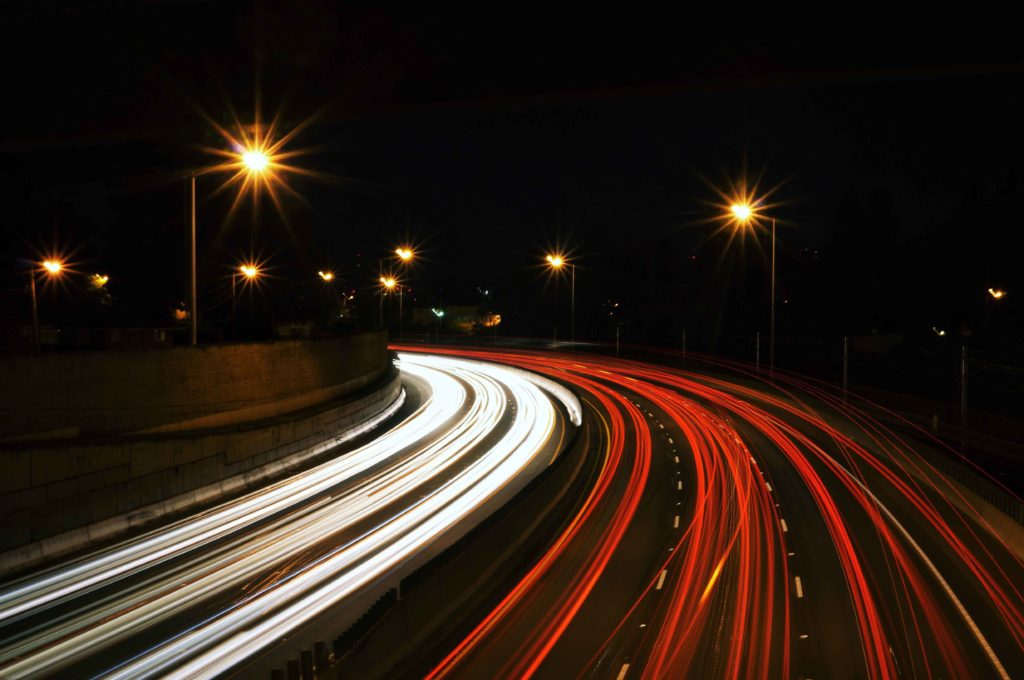
this image is captured with a low range of shutter speed around 10-20 sec, in short in 10 or 20 sec your DSLR camera’s sensor analyzes everything.
if you want to learn how to capture these types of images then here you go…
- Know Traffic Light photography Settings with example
- Capture Stunning Night Photographs Within A Week
When to use a high range of shutter-speed
if you want to capture some objects(like a car or flying bird) which are moving so fast then you must need to use a high range of shutter speed.
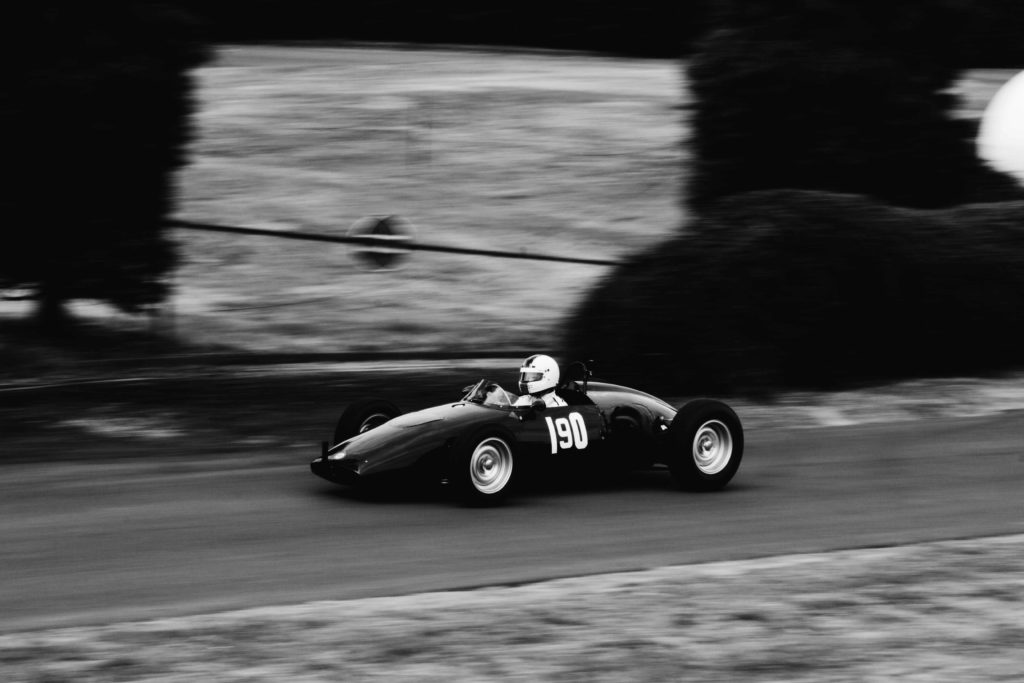
but remember when shutter-speed is high your DSLR camera’s sensor analyzes less so make sure you make the ISO higher
to get bright images.
Our Princess: Aperture
So this is also one of the most important parts to capture sharper images.
we measure the aperture in F steps, range: f/2.8 to f/16(normal DSLR camera).
basically, The aperture is the size of the opening in the lens through which light is allowed to pass whenever the shutter is opened – the larger the aperture, the more light passes through.
So the more light passes through the more brighter images you’ll get.
see this image

So from the images, I hope you’ll understand if the aperture is large then you DSLR camera’s sensor analyze more light.
and if your aperture is low then your DSLR camera’s sensor analyses less light.
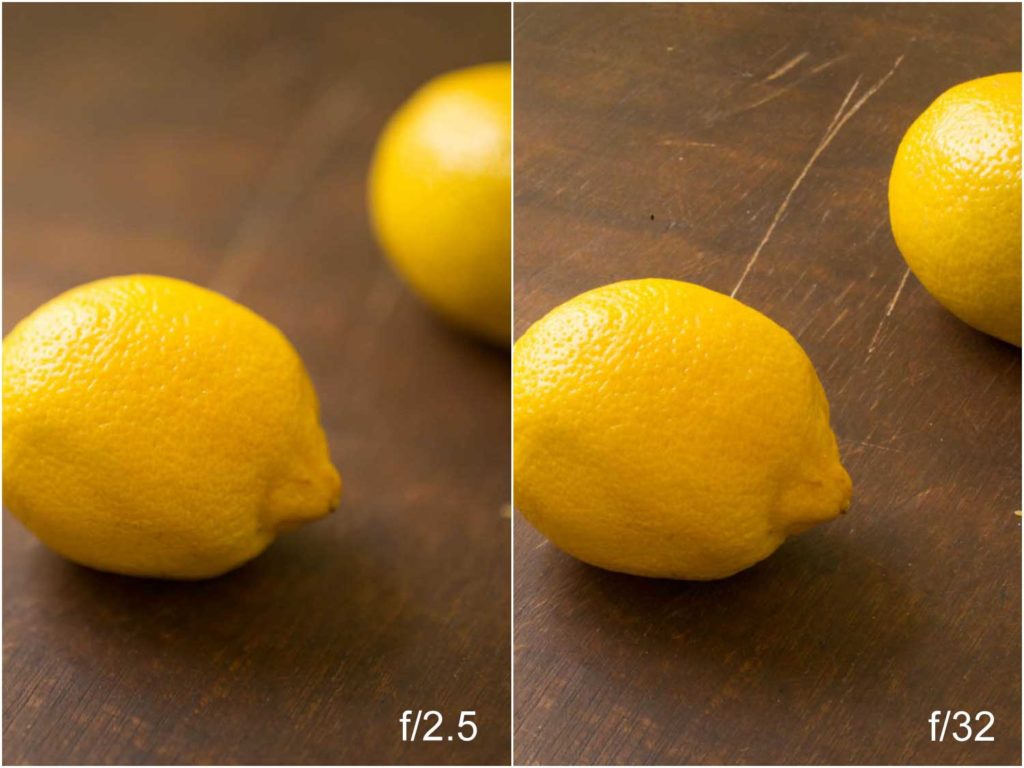
source:serious eats
and now you know what to do when you get low or high light.
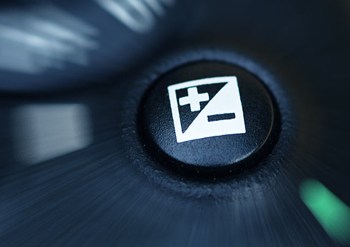
Combo: a combination of these three – exposure triangles
So the exposure triangle is the combination of ISO, Shutter-speed, and aperture, if you change any one of these then it’ll automatically change the other two.
so you must be clear when you change any one of these while doing manual photography.
or if you just make your ISO and shutter speed to auto then there is no need to think about this exposure.
SEE this IMAGE
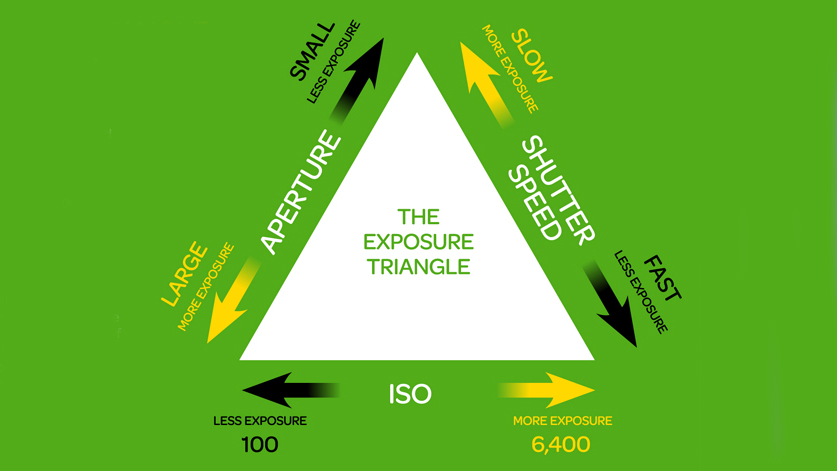
source: TechRadar
Understand all modes
So here is the list of total modes available in canon 1300D
Modes
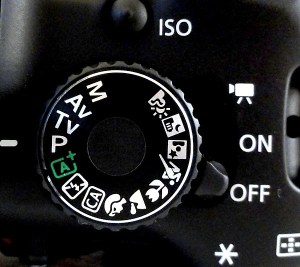
Creative Zone
(if you work on this all modes, you became master in photography within some days or month 110%)
- Program AE
- Shutter-priority AE
- Aperture-priority AE
- Manual Exposure
Basic Zone
- Scene Intelligent Auto
- Flash Off
- Creative Auto
other modes
- Image Zone
- Portrait
- Landscape
- Close-up
- Sport
- Food
- Night portrait
And
- Movie Shooting
let’s understand all these modes in details.
Creative Zone
So if you are a beginner at photography then simply skip all these modes or if you want to become a professional photographer
then just understand all these modes.
and also you must need to do practice every single day using all these modes to get mastery over your DSLR.
1. Program AE
so that’s the first step to get mastery over your DSLR camera.in these modes, you just need to handle all the stuff related to
- ISO
- Exposure
- flash Exposure
- image effect
- auto lighting optimizer
- flash
- manual or autofocus(which you like)
- metering mode
- image size
2. Shutter-priority AE
hope you guys understand this mode by its name,if you want to capture images using shutter-speed then you must need to use these modes.
or you can use manual exposure too but this mode is totally built to capture images using shutter-speed.
you must need to handle all these things manually in this mode.
- Shutter-speed
- ISO
- flash
- exposure
- flash exposure
- and other common stuff.
3. Aperture-priority AE
So to make your background more blurry or to make the focus on your foreground then you must need to use this mode.
in this mode, shutter-speed is in auto mode.
you must need to handle
- aperture
- ISO
- Exposure
- and all other common stuff.
4. Manual Exposure
It is a combination of all these three modes.
if you get better images with all these three modes then this mode is best for you to capture sharper images.
in this mode, you must need to manage everything by yourself.
want to learn manual mode in a week ???, here you go…
Basic Zone
Scene Intelligent Auto
it’s fully automatic shooting mode.
your DSLR camera’s sensor focuses the object automatically, you just need to click.
Flash Off
you capture images without a flash.
to use this mode you must need a tripod.
Creative Auto
this mode worker automatically, you just need to set the range like you want a sharp background or blurry background.
or you also need to handle the flash in this mode.
if you use flash then there is no option you find like the sharp or blurry background, because now all these things
get done by your DSLR camera automatically.
Image Zone
this is the best zone to capture images if you are a newbie.
to capture portrait photographs you can use these modes.
but if you are a master at manual mode then just use manual mode, this all modes are just for beginners.
Related
- 21 easy but never-used Portrait photography tips for you
- Portrait Photography From Snapshots To Great Shots | Beginners Guide
to capture landscape photographs automatically you can use this mode.
Related
Close-up
to get a much more blue background with flash or without flash, you can use these modes.
you also get other features likes
- Sport
- Food
- Night portrait
this all features are works automatically you just need to click on the button to capture images and now you know basic about
all other manual and more important modes.
so it’s better you work on all these modes rather than these modes, its just a waste of time.
may you like this
Manual focus matters
To use your DSLR camera more fastly and also to capture images too sharply you must need to understand the manual focus.
because when you understand manual focus you can able to set the rang around your object.
so you can easily make the background more blurry and the foreground sharper.
or also if you are shooting with autofocus mode then it takes some time to get the object so using manual focus you can manage all these things.
here is the autofocus range which I get in my Canon DSLR camera, Nikon DSLR camera also get this types of range.
when you are shooting at night or in a too much dark environment then beginner DSLR’s lens is not able to quickly get focus on the object.
so to manage those types of things you can also use manual focus.
here I share some of my best articles to archive mastery over manual focus in a week, which include all types of exercises.
which you must need to do to capture more beautiful images using manual focus with a proper grip.
A right tripod
this is also one of the most important factors to capture the best images using your DSLR camera.
or if you are capturing images with shutter-speed then you must need one tripod.
tripod matters allot while capturing landscape photographs or portrait photography and there are so many other ways where you need one tripod.
to use a tripod the better way just find the most needed quality on your tripod.
like how much weight your tripod can able to handle, or the quality of your tripod.
if you are confused and not able to find the best tripod then don’t worry.
here is the list where you can find a quality tripod with very low price, yes newbies can afford it.
in this link, you can also find all the most important specification which must be needed.
- Top 5 Lightweight Camera Tripod Under 19$ | For Beginners
- Amazon’s Top Rated Dolica Tripod GX600B200 Review
capture off flash
this point came when you understand manual mode with all features like ISO, shutter speed and aperture.
because to capture off flash you must need one another flashgun to get better images.
and to get all these things inside your mind you must need to understand all the basic things.
if your DSLR camera contains one flash already then why you need to do off flash photography, yes that’s the right question.
the reason behind that is because using off flash photography you’ll get sharper and blurry background images.
that’s the one factor which I explain but if you want to know more about off flash then I’ll give you one best article.
here you go.
Vertical/horizontal shots
if you want to capture some beautiful portraits then this point is for you, these things matter allots while capturing images with your DSLR cameras.
or especially if you want to expand your portrait then just simply click horizontally.
or if you want to capture portrait for one person then just capture vertically.
I know you are asking me why!!??, the reason behind that is here.
when your object is a single person and when you click vertically then you can able to get more zoom, so you get the more blurry background and that effects your overall portrait images, just check this out.
Bonus For You
white balance
before you capture images you must need to Setup white balance manually if you are using some creative modes.
white balance is the basic feature which makes a huge difference in your overall images which you captured by your DSLR camera.
let’s take one example.
sometimes when you are capturing the sunset images and if your white balance is auto then you get more yellow images, why??.
because we know the light of the sun is yellow which is warm and get sensed by your DSLR camera so it’ll automatically make white balance to daylight and which gives you more warm images.
here are the basic types of white balance
- Daylight – gives neutral light
- Tungsten – Used for indoors, or where the object is darker.
- Fluorescent – gives green/blue tones of fluorescent light.
- Flash – add a cool blue cast to the image, to add warmth.
- Cloudy – used when shooting on a cloudy day. Adds warm tones to daylight photos.
- Shade – if you are shooting in the shade with your DSLR camera then you can use this.
image type
this is also the most important part to get better quality images.
once you are able to capture the best images but you don’t know how to edit sometimes then it’ll make the good image into a bad one.
now you are asking me but..why? and how? if I am capturing better images then what’s the matter??, the quality of your images matters, how!!??.
let me tell you something there are so many images sizes available to store your images in your DSLR camera.
and automatically your DSLR camera right now storing images as JPEG, basically, when you capture images with JPEG it’ll not able to give you full uncompressed images.
that’s why the maximum size of your Captured images is less than 10 MB(sometimes). because JPEG compresses the original images.
but instead of JPEG once you convert the image size from JPEG to RAW, you’ll get full quality images.
and these RAW formatted images are much more rich in quality and size than JPEG because this format gives you uncompressed images.
so using Lightroom you can able to manage all the edit which you cant have if you capture images with JPEG format.
also the color and all other things getting changed fastly when you capture images with RAW.
but the drawback of the RAW format is that if your storage space is less then you can’t able to capture more images.
using RAW format your image size must be around 30 MB (if you are using normal lens).
so just check this out.
May you like this :
if you think this article doesn’t contain what you need then find another cool article on Making the most of your camera.
this article contains such good art and words which may help you to gain great photography skills with some fun.
Conclusion
so that’s the full beginner’s guide to get mastery over your DSLR camera to capture beautiful images.
once you know all this basic stuffs and are able to capture images with manual modes then you are good to go.
just do so much practice and you’ll defiantly get the results, yes it takes time but believes me that time is really worth it.
May you like this
- Attract more audience to your photography blog
- 6 Trusted & High Paying Sites to sell photos online (2024)
- DSLR cameras vs Mirrorless Cameras
- Know Crazy 7 FREE photo-editing applications to grow your Instagram
I hope you guys enjoyed this article, and are now able to capture the best images with your DSLR camera, if you like it then please share it, thank you.

First time here on your blog and it’s amazing! Really had a great time! Keep up the good work.
thank you so much !!