Before I bought myself a new DSLR camera I think capturing good blurred/HD photographs with my 18-55mm lens (kit lens) is quite easy.
but after buying new camera things are not so easy !!
at that time I was thinking like, spending more money on camera gears is more important to capture some stunning photos.
but believe me, that’s not the real truth, if you are thinking like me then you are wrong!
there is nothing wrong with your kit lens, I mean 18-55mm lens.
ask yourself, if you are thinking like me and looking for a new fancy lens that is better than your 18-55mm lens then this article is worth reading.
Many intermediate photographers like to get some lens that contains max aperture like F1.4 or something, yeah it’s good to buy expensive gears.
but before you buy make sure you’re already capturing some stunning shots with your kit lens.
this article saves much of your money and also gives you some good ways to capture some real quality types of photographs with your kit lens.
so if you want to know some super tricks to capture good photos with your 18-55mm lens then this article is for you.
this article is totally about capturing good photographs with an 18-55mm lens, it’s not a how-to type of guide.
if you don’t know how to use an 18-55mm lens then here is the key.
Important Things TO-DO With Your 18-55mm Lens
make background blur with your 18-55mm lens
When I bought a new DSLR camera, this thing is the most important for me.
that blurred background with a cool sharp object, that was just a different level of excitement.
but at that time I don’t know how things works, I don’t even know why am I getting this kind of result.
because at that time I’m not getting every image the way I expected.
at that time I use some different modes and auto-focus to get good blurry effects on my photographs, but behind the scene, I am very curious to know why am I getting this kind of image.
so in this point, I am sharing some of those important tips so you get sharp and blur background types of photographs without any problems.
remember, this ONE thing is the most important to archive a good blurry effect on your photographs.
- The Real Meaning of Aperture
to make blur background, make sure you’re familiar with aperture.
here is the web definition of Aperture.
- Aperture refers to the opening of a lens’s diaphragm through which light passes – Nikonusa
Actually, Aperture decides two factors
- the smaller the f/number, the larger the aperture size
- , and the larger the f/number, the smaller the aperture size.
see this image…

if the aperture size is very less than larger the opening in the lens.
so you get less depth of field and it gives you a more blur type of background, and the same thing in reverse works if you increase the aperture.
here is the golden key to capturing good blurred background with your 18-55mm lens.
Make aperture size as LOW as possible at maximum focal length 55mm( with 18-55mm lens you’ll get max aperture up to 5. something ) to capture good blurry photographs.
see this real example…
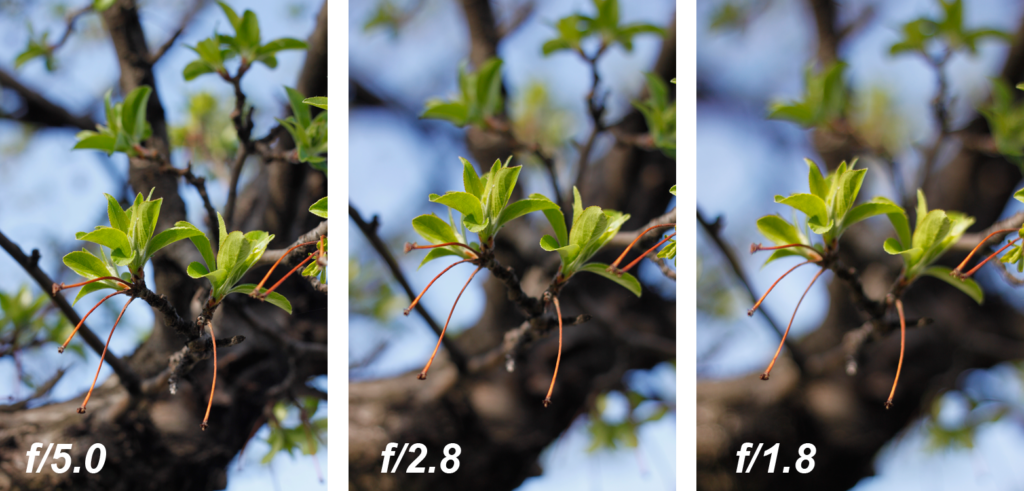
credit: danathomas
Good Portrait with 18-55mm lens
Yes, that’s true.
If you’re already playing with an 18-55mm lens then you must know how to capture good portraits with that kit lens.
here is the thing, using your kit lens you can also able to capture some good portraits.
if you like to capture portrait photographs a lot then this thing is most important for you to start capturing or even practicing with your kit lens first.
the perfect focal length for awesome portraits is around 85mm, here is the turning point.
we have a max focal length of 55mm then how can we can capture a good portrait ??
don’t worry here are some simple steps to capture a good portrait with your kit lens.
if you are using any backdrops then simply make a good distance between your object and backdrop ( so we can blur the background effectively).
setup your camera ( if tripod available then use it ).
zoom-in your lens to its longest focal length of 55mm ( that helps you to get a more compressed background ).
and then use the combination of aperture/focal length to capture good shots.
at the end crop your photograph to get a better portrait.
if you don’t know how to use manual mode then you can use Aperture Priority Mode, this mode is also good to capture good portraits.
if you are asking me about Shutter-speed and ISO then shutter speed about 1/300 and iso is in-between 400-800 is the best option.
because it gives you very clear and sharp photographs.
you can also find places which look more attractive, like a garden or any waterfall, etc.
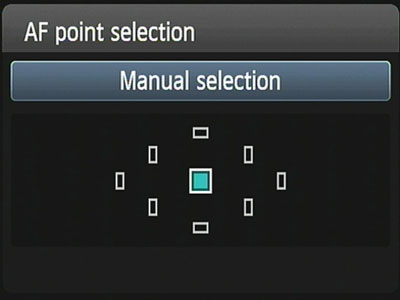
or also if you don’t know how to use Manual Focus then you can use auto-focus with a single-point AF setting.
in the end, you’ll get an awesome blurred background with a rich-quality photograph.
yeah, that’s it !! it’s too easy, believe me.
make sure you shoot in RAW, so you can easily get all the details during the editing time.
just practice a lot and one day you also can able to capture a good portrait with your 18-55mm lens.
The only downside of Kit Lens
As you know, the kit lens is very cheap.
Yes, the kit lens is sharp but because of the maximum aperture around F3.5+, it’s hard to get that much compressed ( blurry ) background.
It may help you to get blurry background during the daytime, but it’s hard to focus and get sharp images during nighttime.
That’s the main reason, people like to buy a lens that comes with a maximum aperture like F1.4 or F1.8 ( prime lens ).
And because of these numbers, these kind of lens are very expensive.
Extra stuff to remember…
- learn How to Use DSLR camera | Beginner to Expert Guide
- Find some stunning photography Hacks without spending money
- Know Rule of Thirds
Hope you like all these tips and now get a better experience with your 18-55mm lens, if you like this article then please share it and comment below your favorite shot, thank you:).