Lights Are a very Important and most Impactful part of any successful photo shoot.
It does not matter if you’re shooting indoors or outdoors light is a major factor.
There are a lot of options available for types of lighting in photography available in the market these days.
But as a beginner, it can be hard to know how to apply lights. Every different type of light has its own benefits and drawbacks. Different types of lighting have different results on the pictures as well.
Hence it is important to learn about the different lighting to know which works best with the project you are handling and other factors as well.
Learning about lighting can also help you in shortlisting the equipment you need.
Therefore we can conclude that before doing anything else in photography one of the most basic steps is to know the types of lighting, how they work, and what effects they have in photographs.
Now Without talking more about it, let’s get started…
Understanding Light In Photography
Now if we see, the classification of light in photography we can see that there are roughly two types of lighting in photography.
These two types of lights include natural and artificial lights, which you might have guessed from the title itself.
Let us further discuss both types of lightning mentioned above.
Natural Lights
As the name suggests this is this type of lighting is found in nature only.
This type of lightning is produced by the moon or the sun and its biggest advantage is that it costs you nothing.
Everything else completely depends on, if you want to use the natural light as it is or use pieces of equipment like reflectors or diffusers.
The only challenge that you can face with natural light is that it can be a bit unpredictable. Hence it is highly suggested to see the weather of the day beforehand.
Natural light depends completely on the time of the day, the location you’re at, the season, and as mentioned earlier, the weather.
No matter what still the instant change in natural light quality of the natural light can help you add a hint of intensity, colour or softness to your images.
Artificial Lights
Now the second type of lighting is artificial lighting. Artificial Lights are lights that are made artificially by us, they are also known as man-made lights.
We can say all the lights excluding the natural lights can be said to be artificial lighting.
There is a lot of Artificial lighting equipment in the field of photography such as Lamps, LEDs, strobe, continuous light, modifiers etc…
The thing all these pieces of equipment have in common is that all of them can provide or maximise the aesthetic effect in your photographs.
Every one of them has different effects such as Continuous lights are always on and produces a soft light, Strobes are flashes that can be either manual or through the lens, and modifiers change the direction, intensity, or quality of light.
One of the most important benefits of Artificial Lights over Natural Light is that you can control the incoming lights.
Artificial lighting can also prove to be more flexible. You can use artificial lighting whenever and wherever you need irrespective of time and place. As there are advantages to artificial lighting, there are disadvantages as well.
One of the disadvantages of artificial lighting is that you need to pay some real amount to get artificial light and they require space to store as well.
Natural Vs Artificial Lights
So before we start, let me share with you some behind the scene setup which I used to capture these shots.
if you’re talking about gear, I captured each image with my Sony A6000 + 55-210mm zoom lens. also to get a steady shot, I used a tripod. 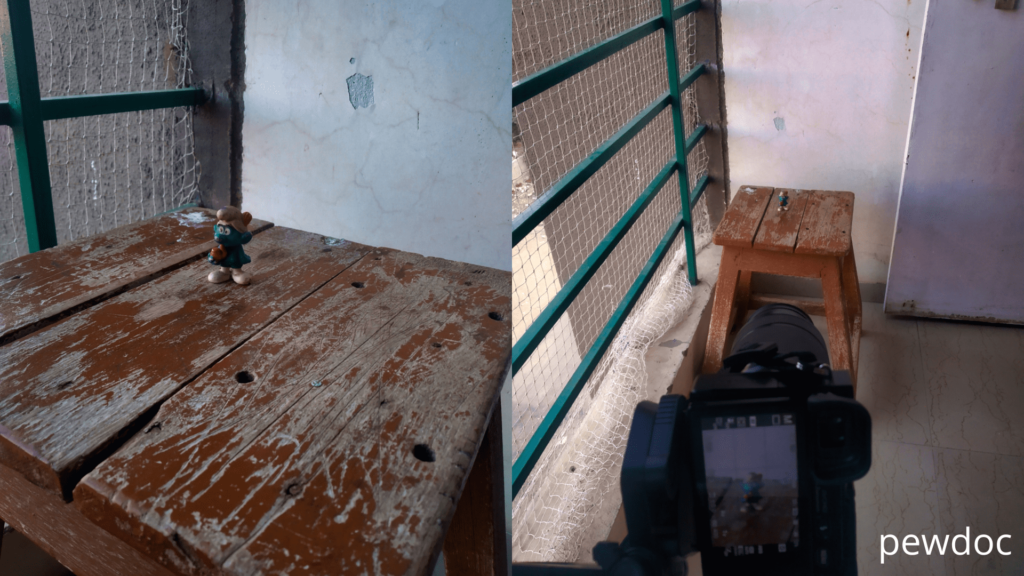 So that’s the basic setup that I used to capture all of these images during evening time ( good natural lights ).
All The images which I shared here are edited using one single preset.
Shootout 1. Natural Lights With Reflectors
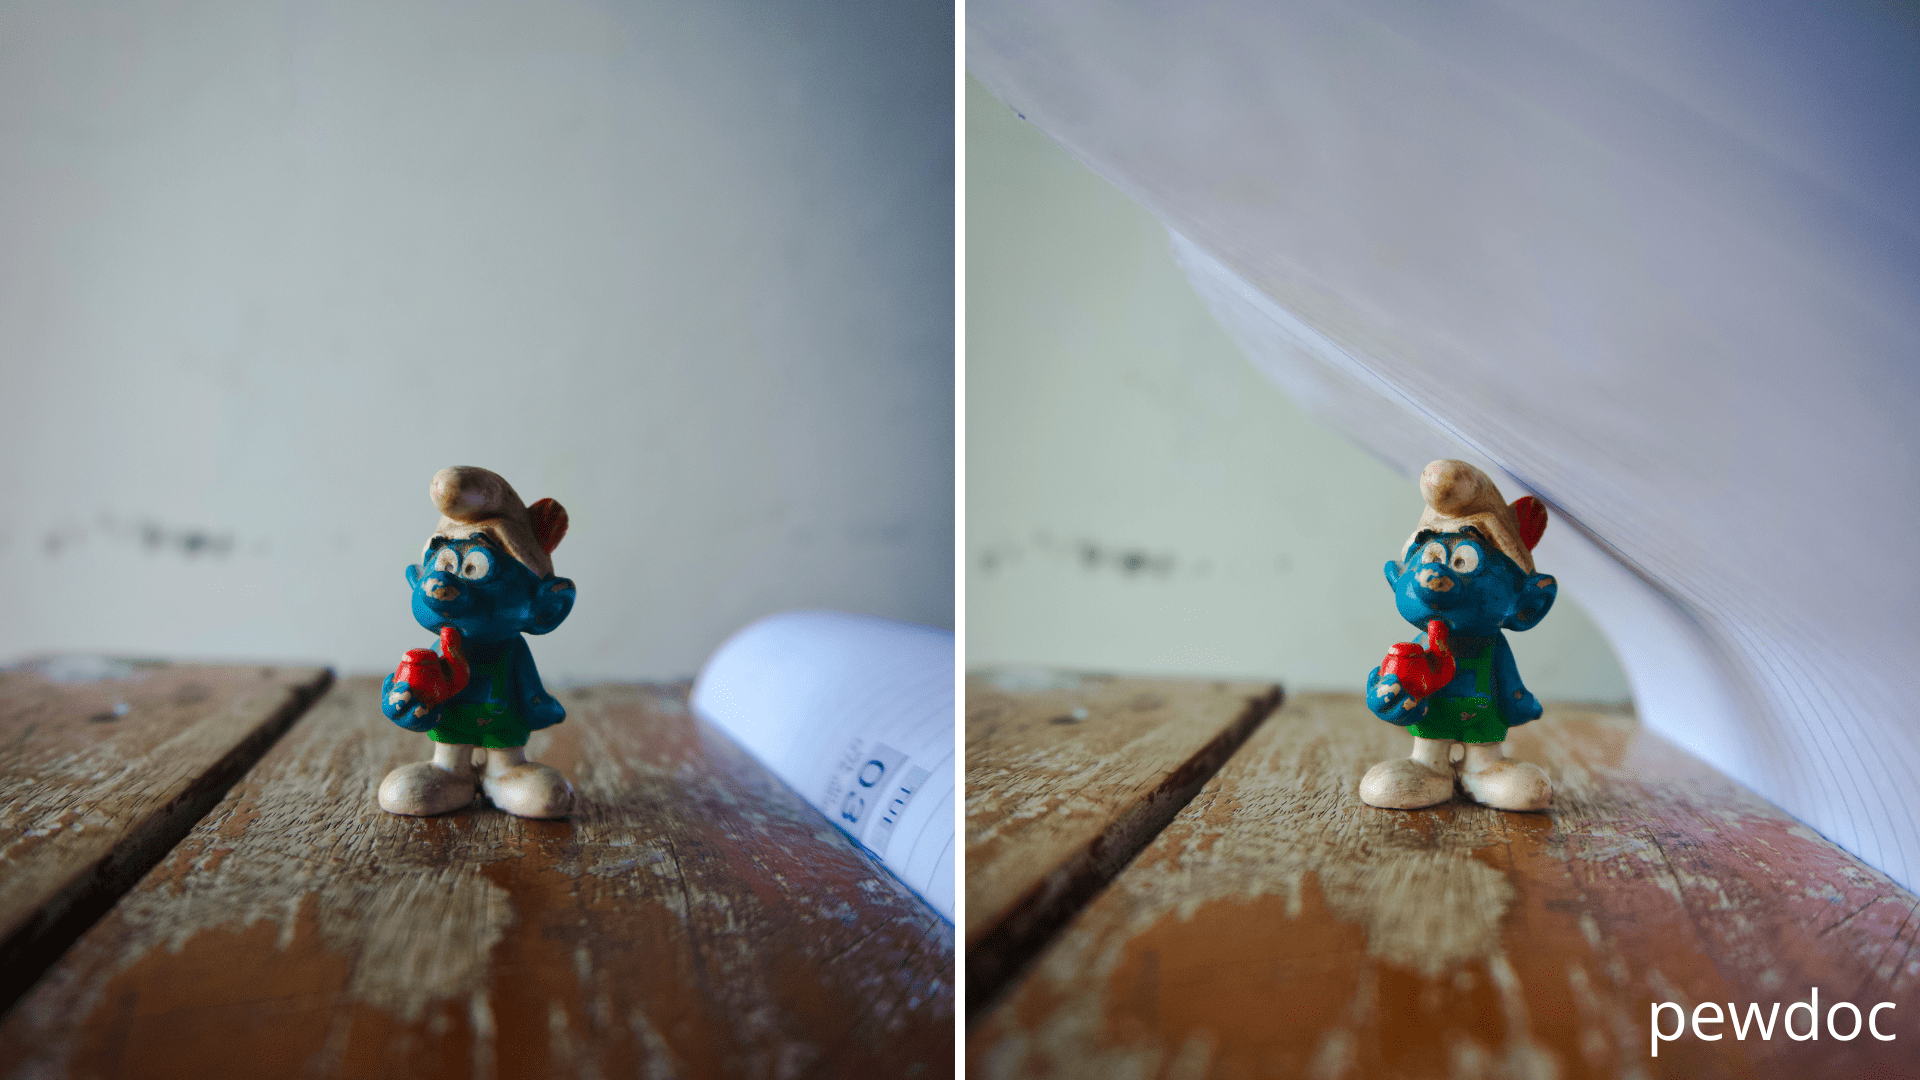
Hope you guys have seen the cover photo of this blog post. that’s the very first example of this shootout. here is the image for a better view… 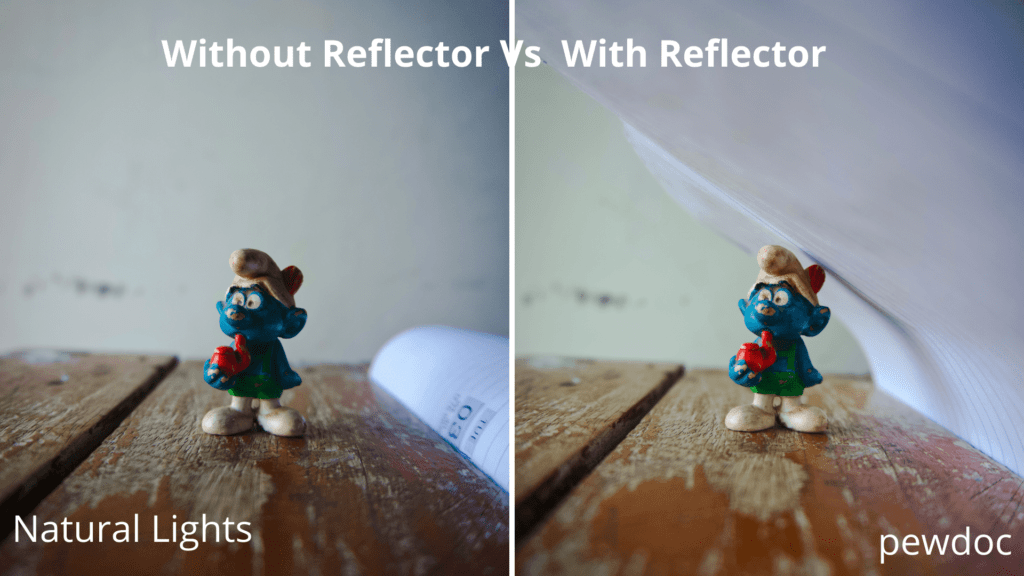 so as you can see on the left side, we have an image that I capture using just natural light coming from the left side.
it’s evening time so that light is not that harsh (kind of soft light). on the other side, as you can see after using white paper as a reflector, we just got a better result.
you can see the right part of the image is pretty visible now. this little trick really helps me to start understanding light in photography.
Shootout 2. Artificial Lights With Reflectors
There are so many possible scenarios available out there that force us to shoot Indoor (especially during covid-19 😀 ).
Like if there is harsh light outside then it’s quite hard for newbie photographers to shoot.
so you can try shooing indoors with some good artificial Lights to gain some new experience. here is my simple indoor set up to shoot with some good Artificial Lights. 
Small LED light + Powerbank
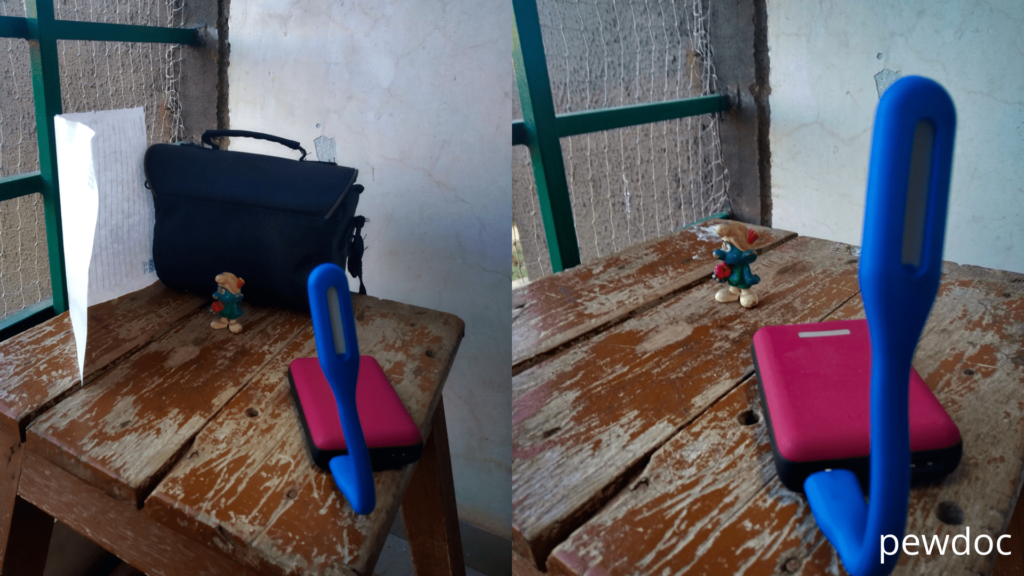 as you can see the location is the same, and we’re getting some good natural lights.
So I just used small LED light as an artificial light source.
you can use any steady light source like Lamp, LED lights, etc… here is the result that I got using artificial Light + with/without reflectors.
With White & Default Backdrop
So this is the image that I captured again using artificial Light with a different backdrop.
when I was exploring or you can say Understanding more about lights in photography, I found that the 45-degree Lighting Setup ratio is best or most common to capture good portraits.
If you know anything more or special about some good lighting setup then please comment below and let me know 😀 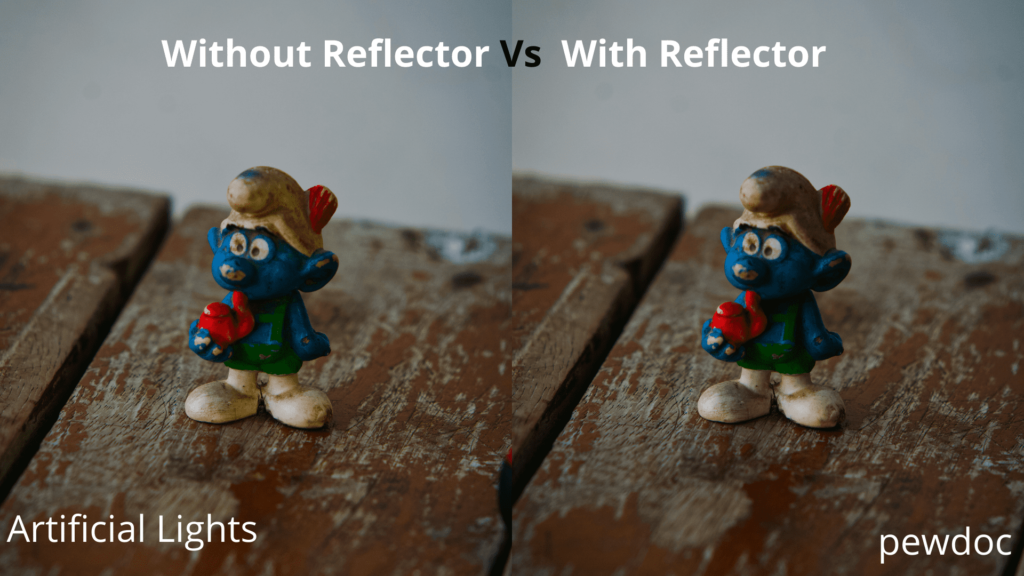
With Black Backdrop
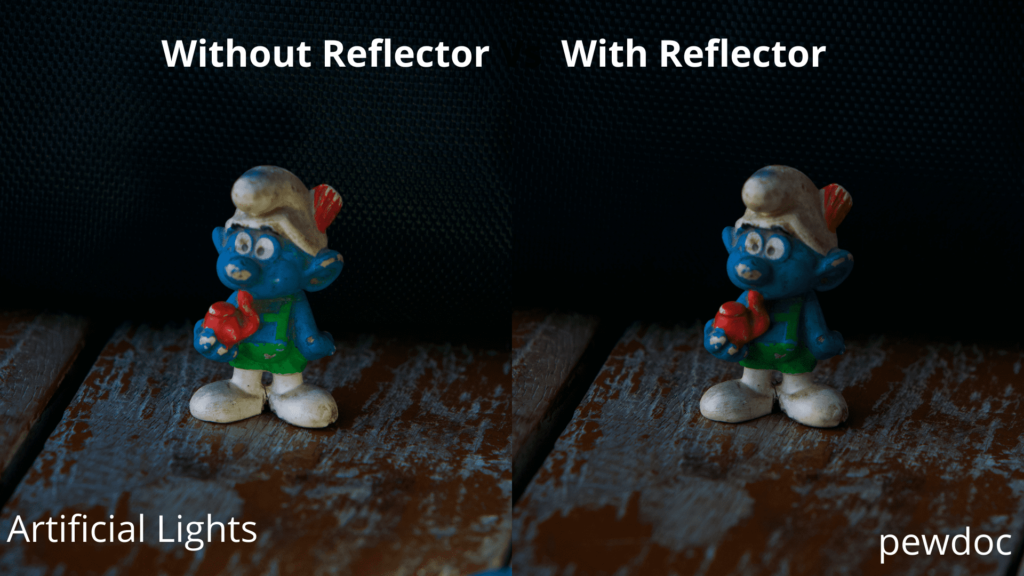 as you can see in the before and after images, how good reflectors are working to get a better texture & details.
That little thing dramatically changes the view of our subject.
As you can see, here I’m using just a small part of the light source so there is no way to talk about hard vs soft light. but here are some cool resources to learn more about it…
-
HARD LIGHT VS SOFT LIGHT. WHAT’S THE DIFFERENCE AND HOW DO YOU DO IT?
- Soft Vs Hard Light – Video Tutorial
Their little tricks I did by viewing lots of different tutorials just to start understanding lights In photography.
and now after getting such amazing results, Now I know why Lights are very important in Photography.
yes, I know why it’s important but never realized or experienced it like this one 😀 So there are some easy and simple steps that you can follow to start understanding how Lights Actually work in Photography.
If you know how to use and apply your lights then believe me you can capture any boring subject into an Intresting one.
- How to do Off-Camera Flash Photography | Tips and tricks
- Add Artificial/Custom Lights to your Images without Photoshop
- Tips to capture sharp photos | 4 ways to get clear images using Photoshop
Conclusion
The debate as to which is the best natural or artificial lighting is a never-ending one.
This debate has no concrete answer. The answer to this question completely depends on the situation, as well as on your judgment, skills, and experience.
You will find almost all the information on the difference between artificial and natural light as well as how they work.
You can also see the different effects both lightings have on the photographs.
Now it is completely and utterly your choice on which kind of lighting you want to use on your shoot.
Hope you guys like this article and learned something new related to Lighting, comment below and let me know your views on Lights In Photography.
Thank you, and have a good day 😀

 FREE Guide Revealed!
 Don't Miss Out The Opportunity To Earn as Photographer in this year :)