Several ways are available to Remove/Update Background Images from any picture using various applications such as Snapseed and many more.
You can use various applications or software such as Photoshop, Corel Photo-Paint, Clipping Magic, PhotoScissors, and many more, the list goes on and on…
But do you know how to update background images using your smartphone & the application called Snapseed?
If you don’t know then in this article, I will share a simple way to update background images using your smartphone via an application called Snapseed.
So, are you guys ready to learn something new today?
Also, in the end, I’m going to share a very easy way to remove the background online.
Now, without talking more about it, let’s get started…
How to update Background Image using Snapseed | 4 Easy Steps
Here are 4 easy steps to Update/Remove Background Images using Snapseed.
1. Download Snapseed
This is the very first thing which you need to do 🙂
Go to the Play Store and download the application Snapseed on your smartphone.
Snapseed is available for both IOS and Android platforms (for free ), so there is no need to worry about it.
After you have downloaded the application, you need a total of two images.
The very first thing is the main image of which you need to change the background.
My personal suggestion would be to choose images that have a great image quality, so the final output looks good.
Now the second thing is the image image which is the background itself, download the image which you like to exchange the background from the original image.
Here is an example for you…
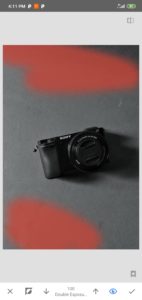
This is the image which we’re going to use.

The background which we’re going to update to.

You can download cool backgrounds from Unsplash if you don’t have any.
2. Edit your Images using Snapseed
This is another important thing which you need to do.
Before we start our main editing, let’s just make simple edits to our selected images.
You can add more colours, clarity, exposure, and all required stuff.
3. Use Double exposure
This is the final part or you can say the key point of removing the background and updating the background image with a new one using Snapseed.
After some simple edits, just upload the main image.
Then you need to select a mode called double exposure, like this…

Next, add your background image make it clear and just save it.
After that click on the right top button and go to edits.
Now you can see each edit you made for this image ( my favourite feature ).
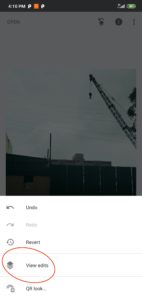
Now select double exposure and click on the edit button.

4. Make the final touch
The thing that you need to know is you. Just need 20% to Update the background image using Snapseed.
Hope you’ll see your background image on the screen.
Next, make details 0 and use your steady hands to remove the not required parts.
When we make details as 0 then the upper background gets erased and we’ll see the default image which we set up earlier.
Now you can choose what you need & also how much opacity you need to make your image look so beautiful.
Here is the final result I got…

Hope you guys learn something new today, if you like this article then please share it.
The article below will tell you about more things you can do with Snapseed.
I just love to see your images too.
So please share under the comment section or mail me, thank you.